- What is Whimsical?
- Getting started with flowcharts
- Getting started with mind maps
- Getting started with wireframes
- Getting started with docs
- What can you do with Whimsical?
- Using Whimsical Boards
- Getting to know Whimsical - video guide 🎥
- Working with Whimsical’s infinite canvas - video guide 🎥
- 5 ways to create a new file
- Getting started with Whimsical AI
- How to create a new workspace
- How to use AI-assisted mind mapping
- Customizing file and folder icons
- Mentions in Whimsical files
- Customizing diagram shapes
- Getting started with sequence diagrams
- Commenting in Whimsical files
- Getting started with flowcharts
- Getting started with mind maps
- Getting started with wireframes
- Using Whimsical Boards
- Mentions in Whimsical files
- Customizing diagram shapes
- Using sections on the Whimsical canvas
- Sketch on the canvas with freehand drawing
- Annotating files for more detail
- Text-to-object pasting options
- Adding and displaying links in Whimsical files
- Linking to sections and objects
- How to draw a line
- How to filter selected objects
- Presenting in Whimsical
- Voting on task cards and sticky notes
- Using the timer in boards
- Working with the grid and auto-alignment
- Working with connectors
- Does Whimsical have cloud architecture icons?
- Using tables in Whimsical
- Using sticky notes in boards
- Optimizing performance in larger files
- Embedding external content into Whimsical
- Using spellcheck
- Setting custom thumbnails
- How overlays work in Wireframe mode
- Hiding cursors while collaborating
- Measure between objects in Boards
- Uploading files to Whimsical
- Getting started with sequence diagrams
- Commenting in Whimsical files
- Getting started with docs
- Mentions in Whimsical files
- Text-to-object pasting options
- Adding and displaying links in Whimsical files
- Linking to sections and objects
- Using tables in Whimsical
- Embedding external content into Whimsical
- Using spellcheck
- Changing page width and text size in Docs
- Collapsing text with toggles
- How to create a new workspace
- Requesting file access
- Workspace discovery settings
- Sorting files and folders
- Changing workspace members’ roles
- Adding and removing members
- Creating and managing teams
- Requesting workspace editor access
- Linking between files
- Member roles in Whimsical
- How to delete a workspace
- How to upgrade your workspace
- Guest access
- Renaming your workspace
- Offboarding users
- Consolidating workspaces
- Uploading files to Whimsical
- SAML
- Setting up SAML session expiry
- Security
- Prevent new workspace creation
- Customizing file and folder icons
- How to draw a line
- How to filter selected objects
- Does Whimsical have cloud architecture icons?
- How overlays work in Wireframe mode
- Moving and copying files
- Using Whimsical on mobile
- Does Whimsical have a dark mode?
- File version history
- Why are the colors of some elements toned down?
- Does Whimsical support offline mode?
- Teams, workspaces & sections explained
- Does Whimsical work on iPad?
- Free viewers commenting in workspaces
- Syntax highlighting in code blocks
- Whimsical desktop app
- Is Whimsical available in other languages?
- Inverting the zoom direction in Whimsical so it works more like Sketch
- Troubleshooting issues and reporting bugs
- How to add emojis
- Team FAQs
- How to restore deleted files from the trash
- Searching in your Whimsical workspace
- Organizing files in your workspace
- I’ve upgraded but still don’t have access to the paid features
- Why can't I edit my files?
- Reporting content in Whimsical
- Does Whimsical have an affiliate or referral program?
- Collaborating with others in real time
- Sharing files and managing access permissions
- Hiding cursors while collaborating
- How to switch between workspaces
- Sharing feedback and feature requests
- Embedding & integrating boards with Jira Issues
- Integrating Whimsical with Google Docs
- Embedding files in ClickUp views
- Embedding files in Asana
- Embedding Whimsical files
- Whimsical AI Diagrams for ChatGPT
- Creating Jira & Confluence Smart Links for Whimsical Files
- Embedding files in Guru
- Embedding files in Trello
- Embedding & integrating boards in Notion
- Integrating Whimsical and GitHub
- Embedding files in Zendesk
- Support Whimsical embeds in your app with EmbedKit
- Whimsical previews and notifications in Slack
- Embedding files in Canva
- Integrating Whimsical and Linear
- Embedding files in Nuclino
- Embedding files in Monday
- Embedding files in Medium
- Embedding files in Slab
- Embedding files in Coda
- Whimsical API (Beta)
- SAML
- SAML SSO in Whimsical
- SAML SSO with Okta
- SAML SSO with Auth0
- SAML SSO with OneLogin
- SAML SSO with Microsoft Entra ID (Azure AD)
- SAML SSO with Google Workspace (previously G-Suite)
- SAML SSO with Active Directory Federation Services (ADFS)
- SAML SSO with other identity providers
- Setting up SAML session expiry
- Managing email changes with SAML and SCIM
- SCIM
- Setting up SCIM with Okta
- Setting up SCIM with JumpCloud
- Setting up SCIM with Entra ID (Azure AD)
- SCIM provisioning with Groups in Okta
- SCIM user provisioning in Whimsical
- SCIM provisioning with Groups in Entra ID (Azure AD)
- Security
- Setting up Two-factor Authentication (2FA)
- Prevent new workspace creation
- Whitelisting Whimsical domains
- Signing in with your Whimsical account on multiple devices
- Contact us
Getting started with projects
This feature is going away soon
Whimsical Projects, Tasks, and Posts will be sunset on January 15, 2026. You can export your data anytime before then, and your content will be automatically converted into docs on January 15 so nothing gets lost. For more information, please check out our FAQ.
For a quick video guide to Whimsical Projects, check out this 60 second video:
This article will teach you everything you need to get started, or you can jump to a specific section with the links below 👇
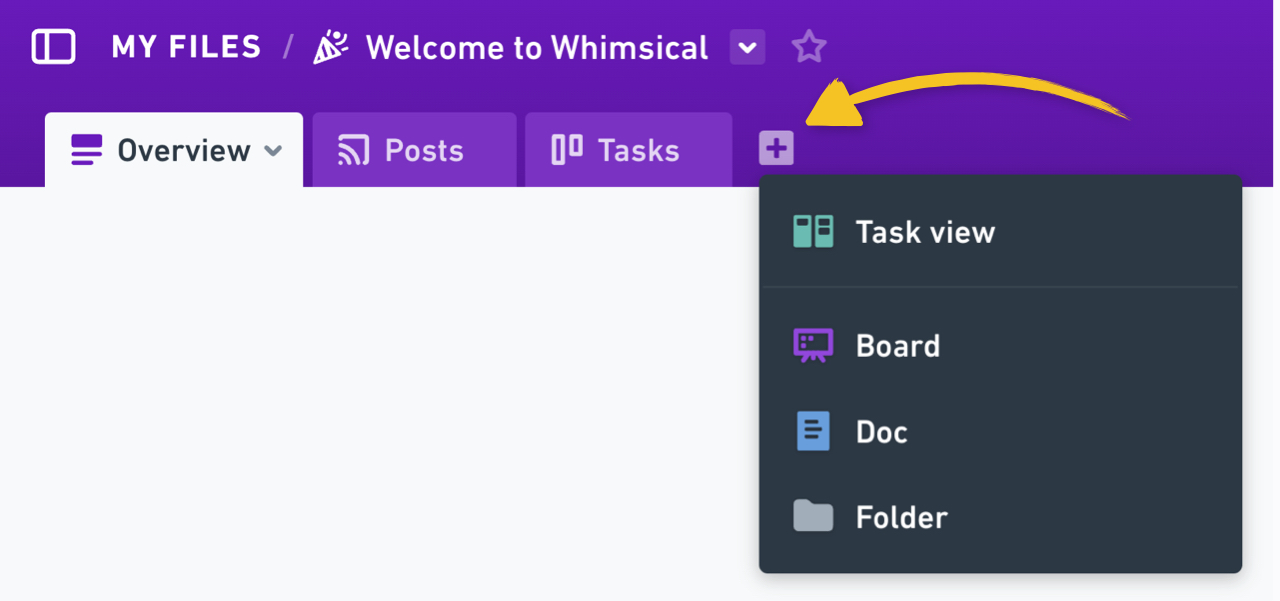
To create a new project, click the + Create new button in your sidebar:

Every new project starts with three tabs:

You can also create custom tabs containing:
Overview tabCopied!Link to this section
The project overview tab is the place for all the high level info - Imagine coming to the project for the first time, what basic context do you need to get up to speed?
- The project title
- A short description (Try one or two paragraphs max - the elevator pitch for the project)
- The current Status of the project (Choose from: Early ideas, Being written, Ready to build, Active, Done, or Canceled) - These statuses are also used to group your projects in the sidebar 👌
- The project lead - Assign a member of your Whimsical workspace who is directly responsible for the project (the DRI).
- Team - These are the people who are (or will be) working on the project. Assign as many members of your Whimsical workspace as you like

Below these key pieces of info you’ll find Whimsical's rich Docs editor, so you have all the same functionality you’re used to (callouts, formatting, embeds etc.) and you can write your PRD, Pitch doc, or whatever your team uses to outline a project.
You can also use any of Whimsical’s docs templates (or your own custom templates) here:

Tip: The overview tab will also conform to your preferred page width and text size.
You can disable the overview tab from your project settings:

PostsCopied!Link to this section
This tab is the communications hub for all things related to your project - with a full chronological history of communications that you can subscribe to, and share with a Slack channel - to learn all about Posts read this article.

Note: You can disable the posts tab from your project settings, just like the overview tab (see above ☝️ )
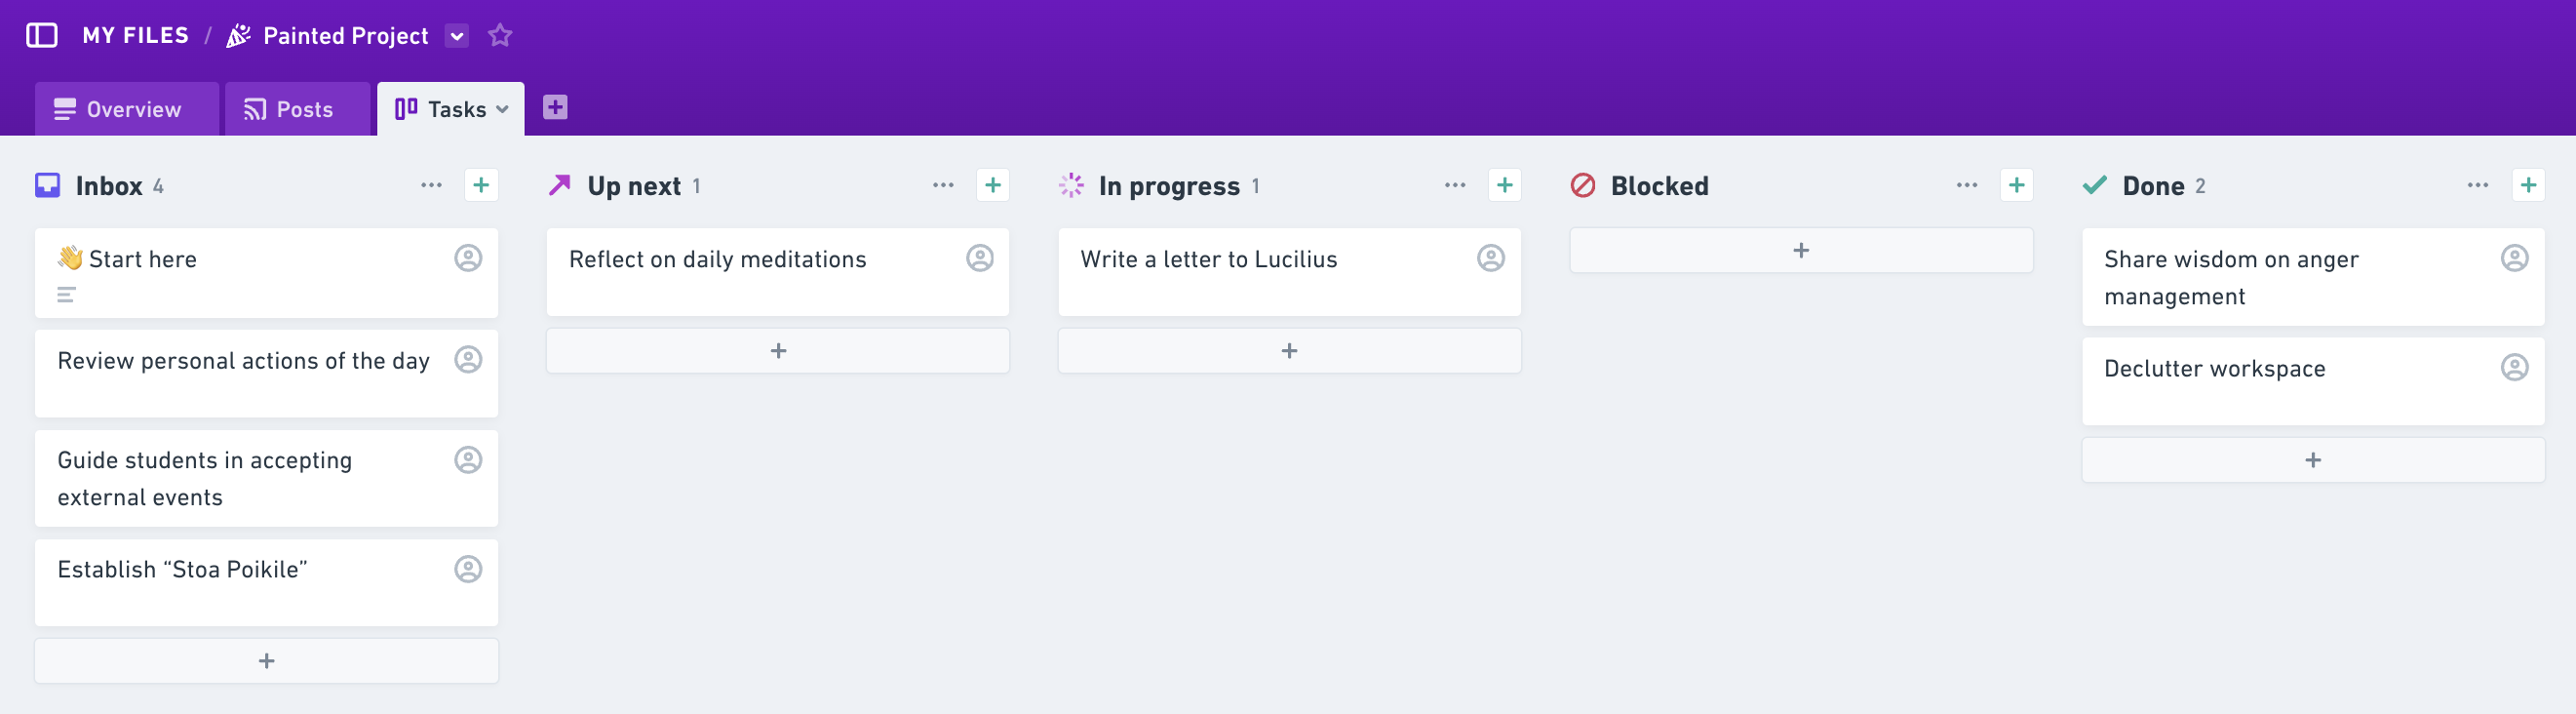
TasksCopied!Link to this section
This is the default tasks view for the project, which you can see as a Kanban view (columns/stacks) or as a list.
When a project is created the tasks view will show all tasks, grouped by status:
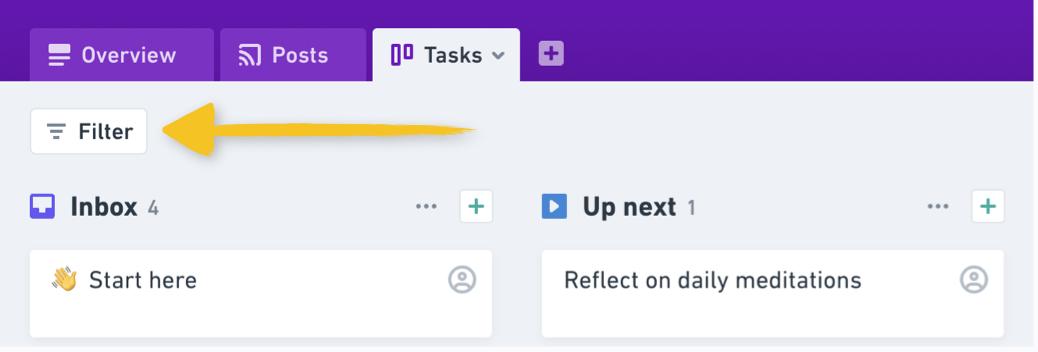
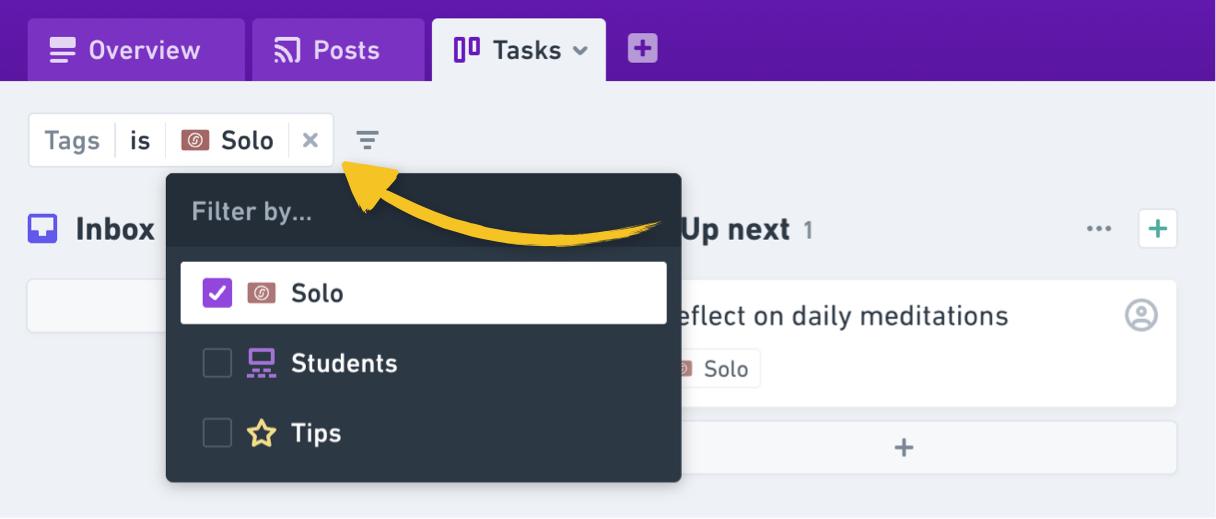
You can filter this view however you like, just click Filter on the left:
The available filters are:
- Status
- Assignee
- Creator
- Tags
- Due date
- Completed date
- Created date
- Modified date
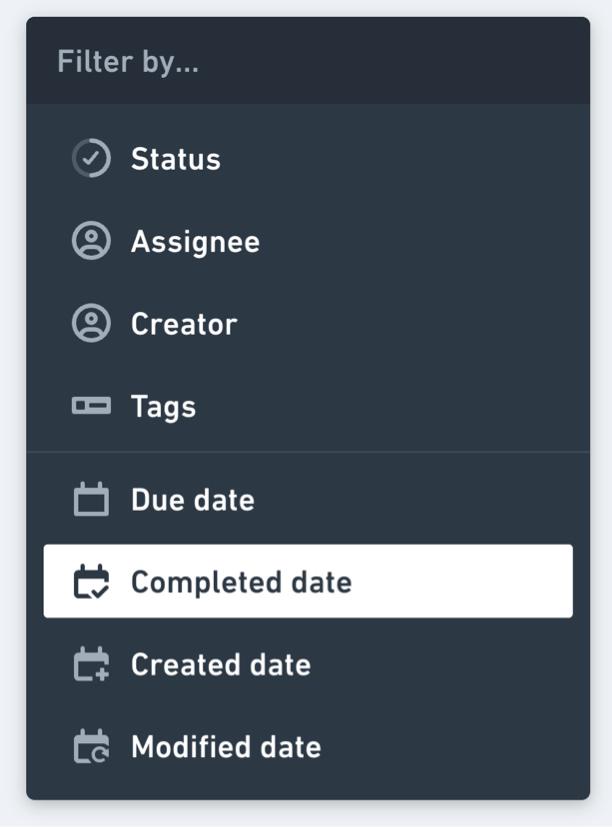
Filters can be combined into useful combinations like: Completed in the last week, with the tag "bug" or All tasks with no assignee, created in the last month
You can also sort or group this view differently depending on your needs, with the Display button on the right:
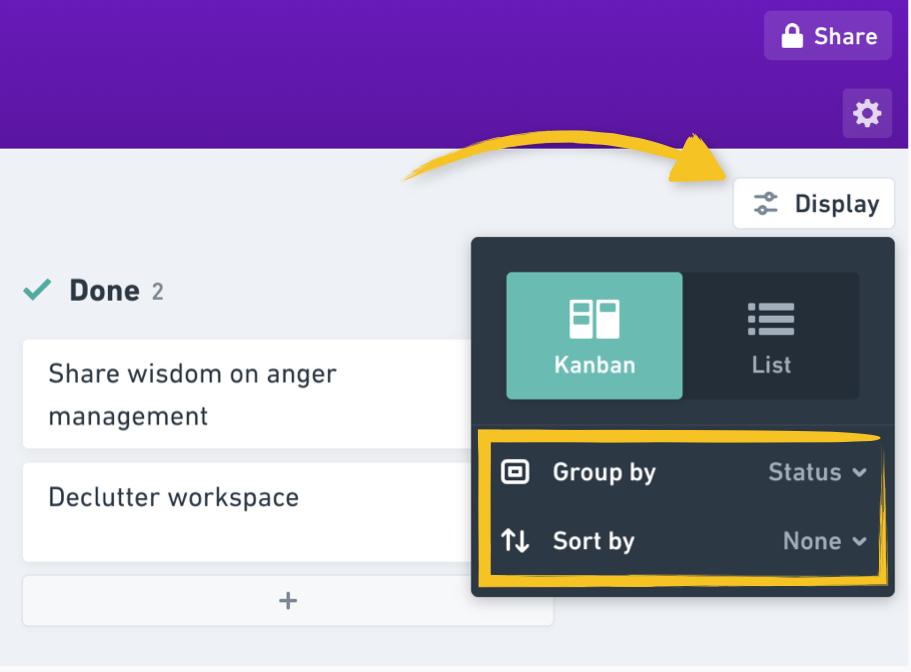
Tip: You can also create custom views, covered below. 👇
Tasks are grouped into the following statuses by default:
- Inbox
- Up next
- In progress
- Blocked
- Done
To edit the task statuses click the gear icon on the right, and switch to Statuses:

Tip: You can set default task statuses (or enable or disable due dates in tasks) on a per-team basis, see this article to learn how.
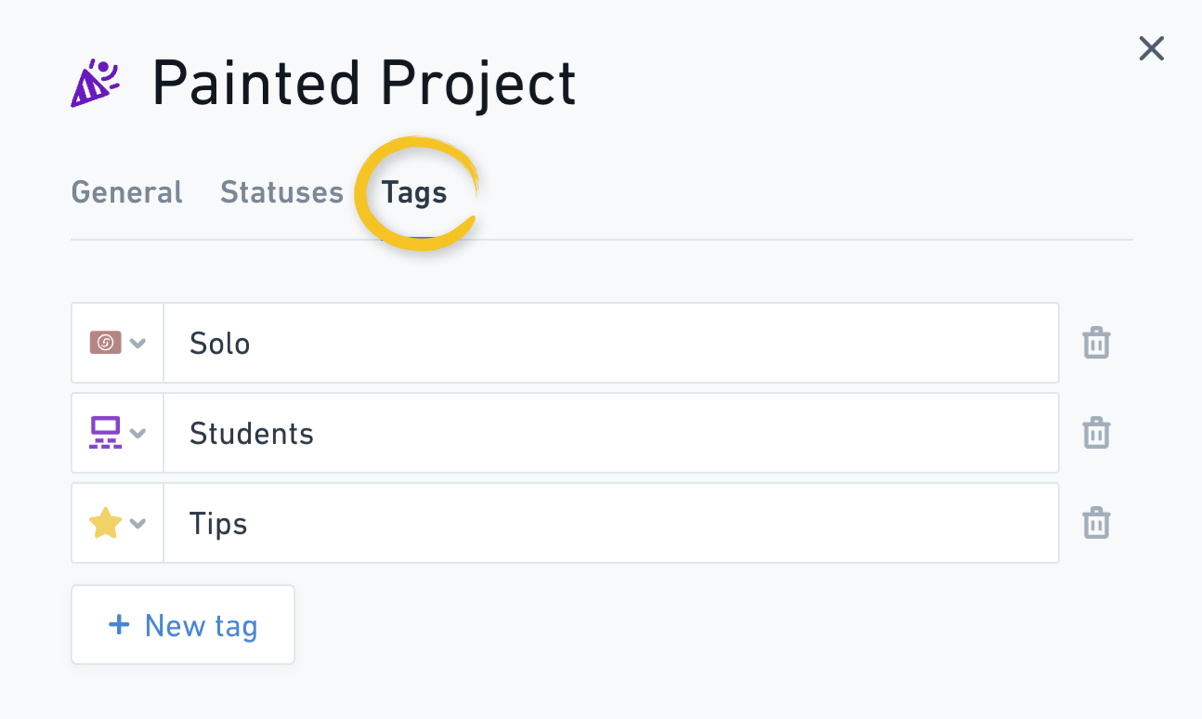
Tasks can also be tagged for organization and filtering:
You can create new tags as you need them, or create and edit tags in project settings (the gear icon), under Tags:
To learn all about creating and managing tasks, check out this article.
Task viewsCopied!Link to this section
A custom task view lets you see just the tasks that are relevant to you, sorted exactly how you like them. These appear as new tabs in the project’s header:

You might want a view that shows just the tasks being currently worked on, grouped by who they’re assigned to - or a view that shows all blocked, or overdue tasks so you can see where your team might need your help.
Custom views are private when you create them, and they can stay private as long as you like. Or, you can publish them so they’re visible to everyone with access to the project:

Note: Any public view can be edited by anyone with access to it.
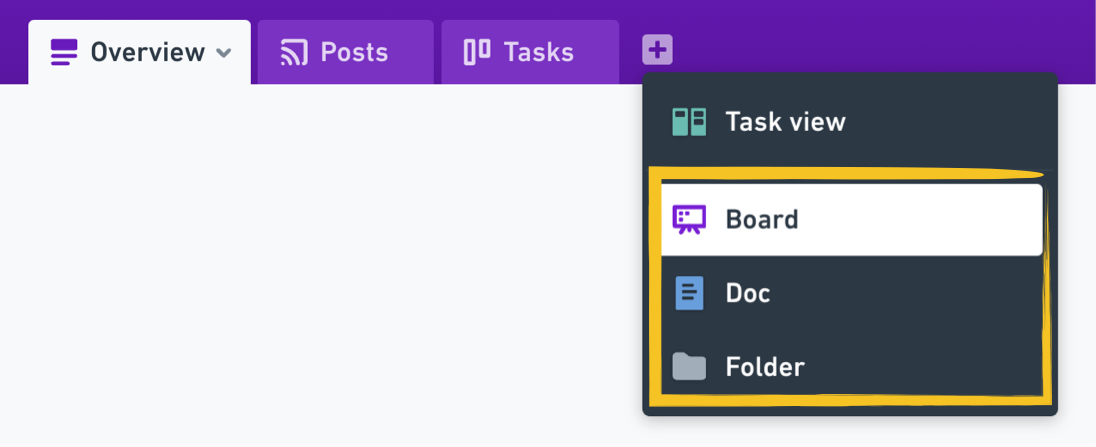
Nested boards, docs and foldersCopied!Link to this section
Within each project you can create new boards, docs, or folders as tabs:
This lets you keep all the info you need for your project - like tech trees, user flows and wireframes all in one place 🤩
Pro tip: Check out Whimsical’s templates when adding new nested files:

You can also move existing files or folders to be nested under projects - just follow the steps in this article.
Sharing projectsCopied!Link to this section
Check out this article for a full guide on how to share projects, and the files nested within them. 👌
