- What is Whimsical?
- Getting started with flowcharts
- Getting started with mind maps
- Getting started with wireframes
- Getting started with docs
- What can you do with Whimsical?
- Using Whimsical Boards
- Getting to know Whimsical - video guide 🎥
- Working with Whimsical’s infinite canvas - video guide 🎥
- 5 ways to create a new file
- Getting started with Whimsical AI
- How to create a new workspace
- How to use AI-assisted mind mapping
- Customizing file and folder icons
- Mentions in Whimsical files
- Customizing diagram shapes
- Getting started with sequence diagrams
- Commenting in Whimsical files
- Getting started with flowcharts
- Getting started with mind maps
- Getting started with wireframes
- Using Whimsical Boards
- Mentions in Whimsical files
- Customizing diagram shapes
- Using sections on the Whimsical canvas
- Sketch on the canvas with freehand drawing
- Annotating files for more detail
- Text-to-object pasting options
- Adding and displaying links in Whimsical files
- Linking to sections and objects
- How to draw a line
- How to filter selected objects
- Presenting in Whimsical
- Voting on task cards and sticky notes
- Using the timer in boards
- Working with the grid and auto-alignment
- Working with connectors
- Does Whimsical have cloud architecture icons?
- Using tables in Whimsical
- Using sticky notes in boards
- Optimizing performance in larger files
- Embedding external content into Whimsical
- Using spellcheck
- Setting custom thumbnails
- How overlays work in Wireframe mode
- Hiding cursors while collaborating
- Measure between objects in Boards
- Uploading files to Whimsical
- Getting started with sequence diagrams
- Commenting in Whimsical files
- Getting started with docs
- Mentions in Whimsical files
- Text-to-object pasting options
- Adding and displaying links in Whimsical files
- Linking to sections and objects
- Using tables in Whimsical
- Embedding external content into Whimsical
- Using spellcheck
- Changing page width and text size in Docs
- Collapsing text with toggles
- How to create a new workspace
- Requesting file access
- Workspace discovery settings
- Sorting files and folders
- Changing workspace members’ roles
- Adding and removing members
- Creating and managing teams
- Requesting workspace editor access
- Linking between files
- Member roles in Whimsical
- How to delete a workspace
- How to upgrade your workspace
- Guest access
- Renaming your workspace
- Offboarding users
- Consolidating workspaces
- Uploading files to Whimsical
- SAML
- Setting up SAML session expiry
- Security
- Prevent new workspace creation
- Customizing file and folder icons
- How to draw a line
- How to filter selected objects
- Does Whimsical have cloud architecture icons?
- How overlays work in Wireframe mode
- Moving and copying files
- Using Whimsical on mobile
- Does Whimsical have a dark mode?
- File version history
- Why are the colors of some elements toned down?
- Does Whimsical support offline mode?
- Teams, workspaces & sections explained
- Does Whimsical work on iPad?
- Free viewers commenting in workspaces
- Syntax highlighting in code blocks
- Whimsical desktop app
- Is Whimsical available in other languages?
- Inverting the zoom direction in Whimsical so it works more like Sketch
- Troubleshooting issues and reporting bugs
- How to add emojis
- Team FAQs
- How to restore deleted files from the trash
- Searching in your Whimsical workspace
- Organizing files in your workspace
- I’ve upgraded but still don’t have access to the paid features
- Why can't I edit my files?
- Reporting content in Whimsical
- Does Whimsical have an affiliate or referral program?
- Collaborating with others in real time
- Sharing files and managing access permissions
- Hiding cursors while collaborating
- How to switch between workspaces
- Sharing feedback and feature requests
- Embedding & integrating boards with Jira Issues
- Integrating Whimsical with Google Docs
- Embedding files in ClickUp views
- Embedding files in Asana
- Embedding Whimsical files
- Whimsical AI Diagrams for ChatGPT
- Creating Jira & Confluence Smart Links for Whimsical Files
- Embedding files in Guru
- Embedding files in Trello
- Embedding & integrating boards in Notion
- Integrating Whimsical and GitHub
- Embedding files in Zendesk
- Support Whimsical embeds in your app with EmbedKit
- Whimsical previews and notifications in Slack
- Embedding files in Canva
- Integrating Whimsical and Linear
- Embedding files in Nuclino
- Embedding files in Monday
- Embedding files in Medium
- Embedding files in Slab
- Embedding files in Coda
- Whimsical API (Beta)
- SAML
- SAML SSO in Whimsical
- SAML SSO with Okta
- SAML SSO with Auth0
- SAML SSO with OneLogin
- SAML SSO with Microsoft Entra ID (Azure AD)
- SAML SSO with Google Workspace (previously G-Suite)
- SAML SSO with Active Directory Federation Services (ADFS)
- SAML SSO with other identity providers
- Setting up SAML session expiry
- Managing email changes with SAML and SCIM
- SCIM
- Setting up SCIM with Okta
- Setting up SCIM with JumpCloud
- Setting up SCIM with Entra ID (Azure AD)
- SCIM provisioning with Groups in Okta
- SCIM user provisioning in Whimsical
- SCIM provisioning with Groups in Entra ID (Azure AD)
- Security
- Setting up Two-factor Authentication (2FA)
- Prevent new workspace creation
- Whitelisting Whimsical domains
- Signing in with your Whimsical account on multiple devices
- Contact us
Creating tasks in docs and boards
Creating tasks in docsCopied!Link to this section
This feature is going away soon
Whimsical Projects, Tasks, and Posts will be sunset on January 15, 2026. You can export your data anytime before then, and your content will be automatically converted into docs on January 15 so nothing gets lost. For more information, please check out our FAQ.
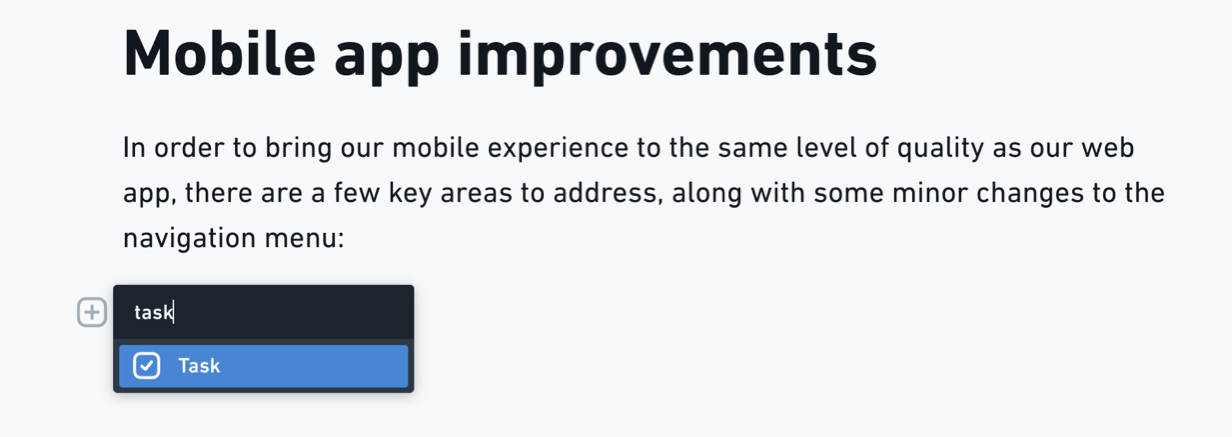
Hit / and then choose Task from the menu that appears (or type “task” and hit enter):
This will open up the new task modal, where you can enter a title and description, choose a color, and assign someone to the task:
You can also choose to add the task to a project, or leave it as a standalone task in the doc:
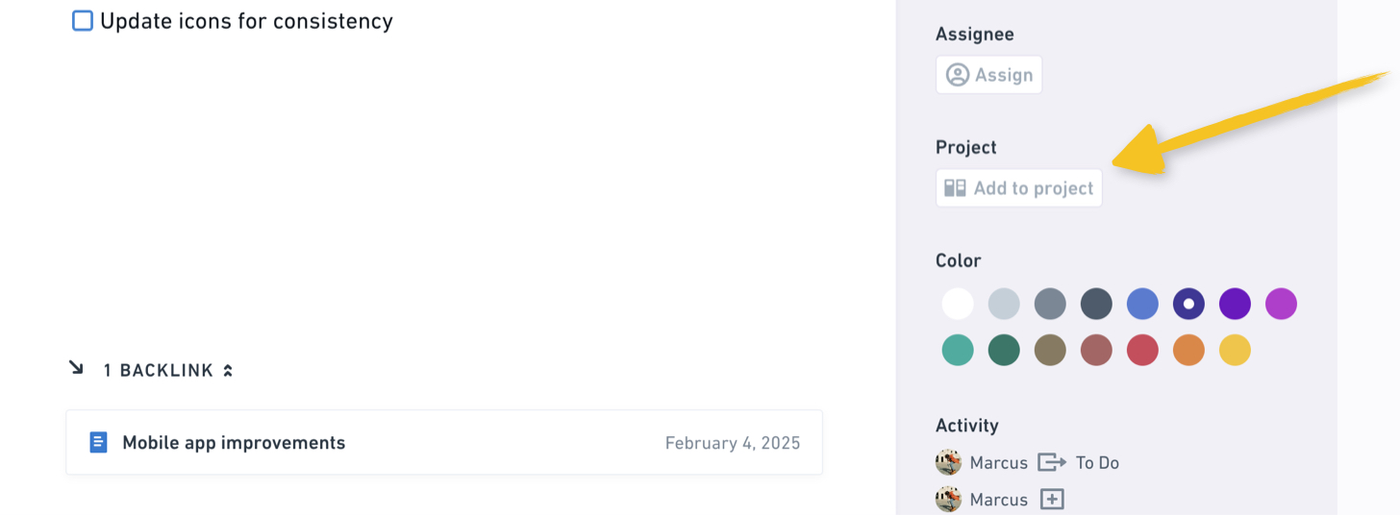
If you do it will appear here in the doc and in the tasks view for that project. Once added to a project, you’ll see two new options:
- Add tags - choose from the project’s existing tags, or create new ones.
- Change the status - Your choice of status will also update the color of the task card.
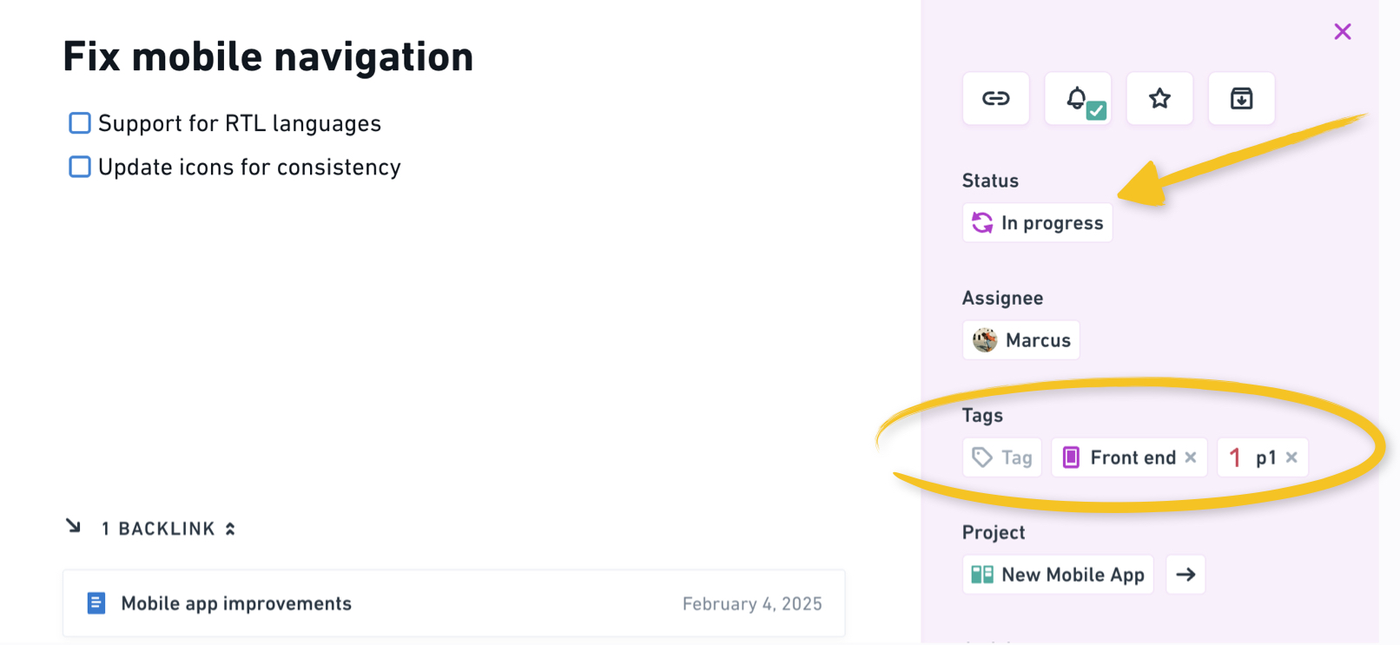
You’ll then see the task card in the doc with some info visible at a quick glance:
- The assignee is shown on the top right (you can also assign someone here without opening the card)
- Tags are shown across the bottom
- If the task has a description, you’ll see an icon showing that on the bottom left
- The task card’s color is updated automatically based on the status
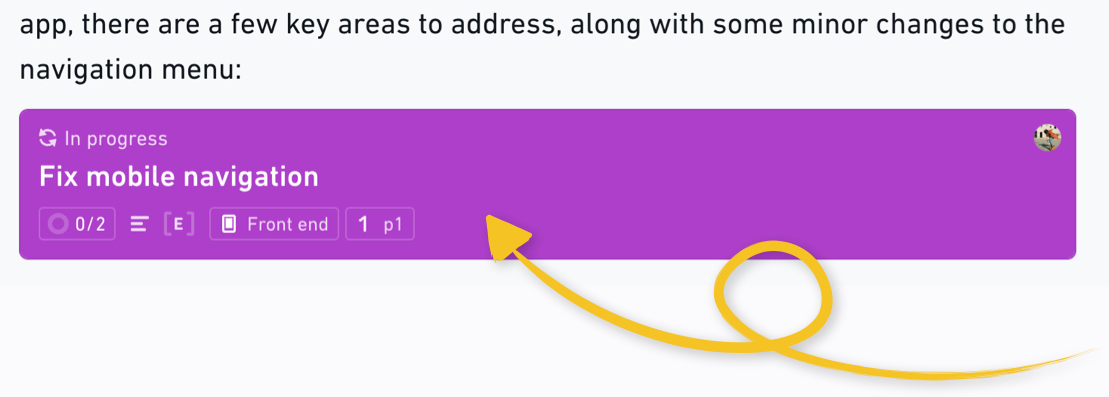
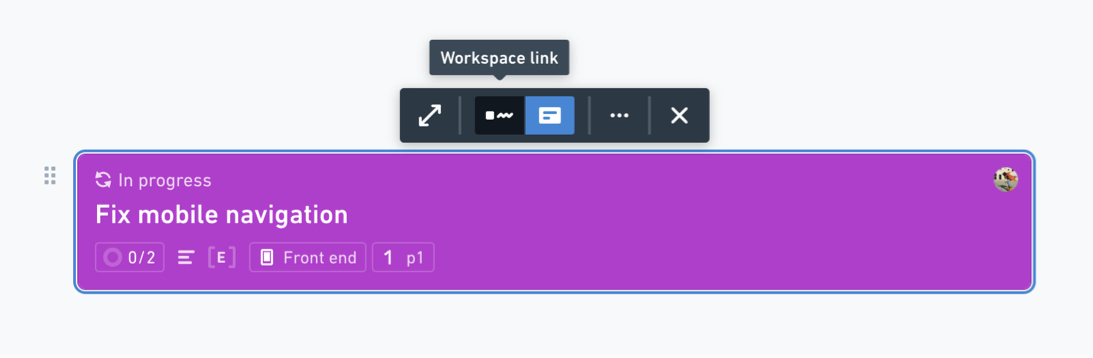
Double click the task to open it and view all the details, or you can switch it to display as a link instead of an embedded card:
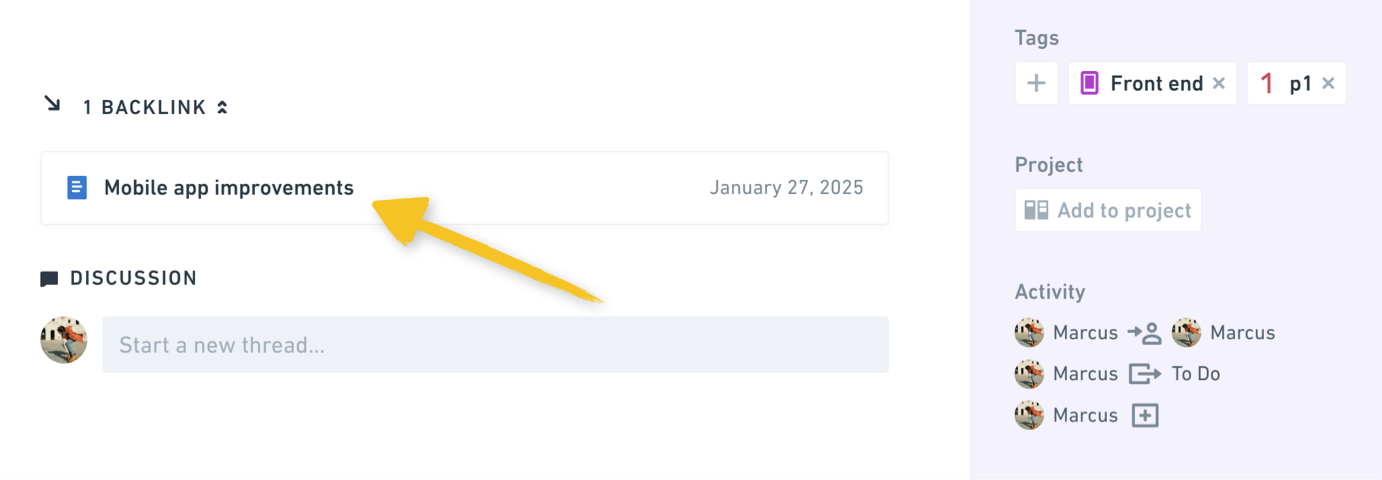
The card will also have a backlink to the doc that it’s in, which comes in handy if you’re viewing it in the linked Project:
Creating tasks in boardsCopied!Link to this section
Whimsical allows you the flexibility of viewing/creating your tasks on a board’s infinite canvas, alongside wireframes, flowcharts, and anything else you can imagine.
Here's a quick guide to help you get the most out of Whimsical tasks and stacks on your boards.
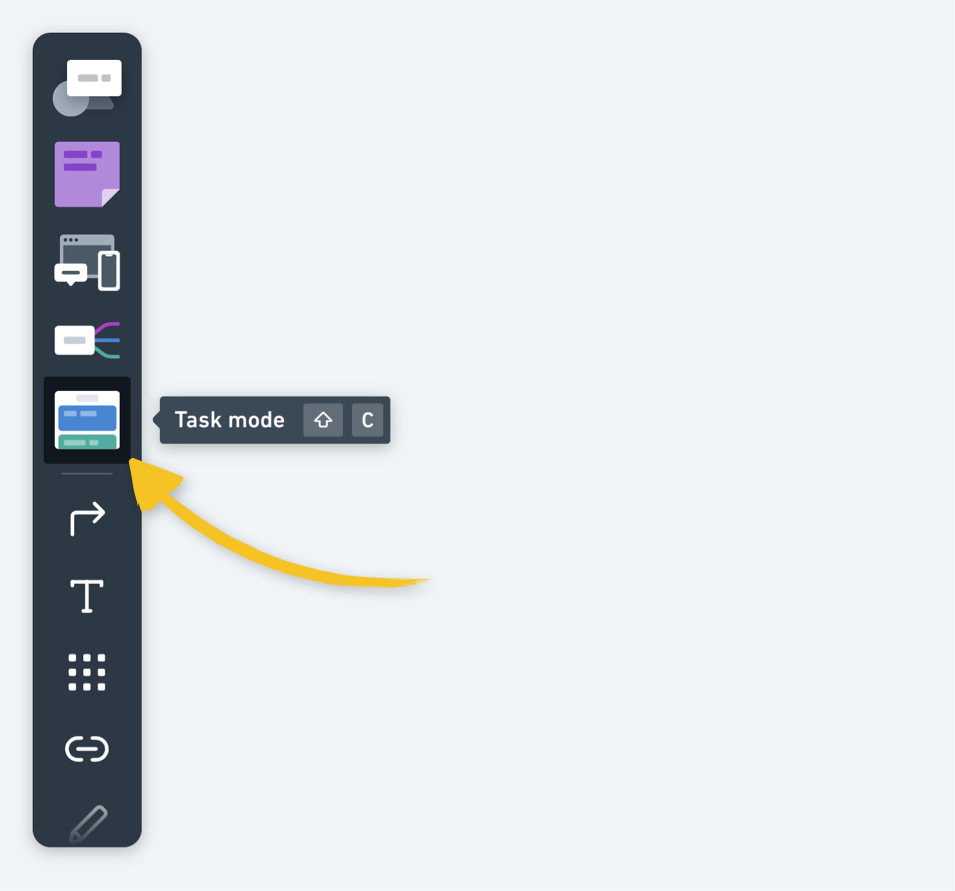
Entering and exiting task modeCopied!Link to this section
You can enter task mode with this button in the toolbar, or the keyboard shortcut Shift + C:
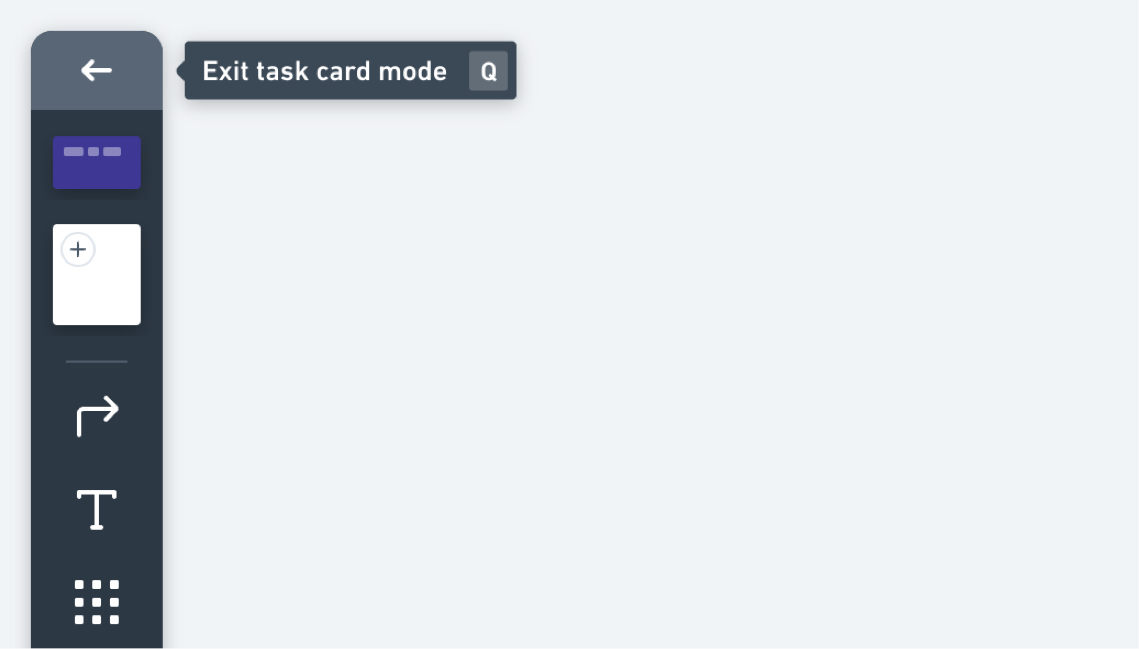
To exit task mode, select the ⬅️ arrow in the toolbar or use the keyboard shortcut Q :
Making stacks and task cardsCopied!Link to this section
First, make sure you have task mode enabled. (See above 😉)
To make your first stack:
- Click or drag a stack out from the toolbar
- Use the keyboard shortcut
S
To create a task card:
- Double-click on the canvas
- Click or drag a task card out from the toolbar
- Use the keyboard shortcut
A

You can also use the All tools menu to add individual tasks and stacks without enabling card mode. Add other items to the same board alongside your stacks and tasks, like sticky notes, mind maps, and wireframes.

Customizing stacks and task cardsCopied!Link to this section
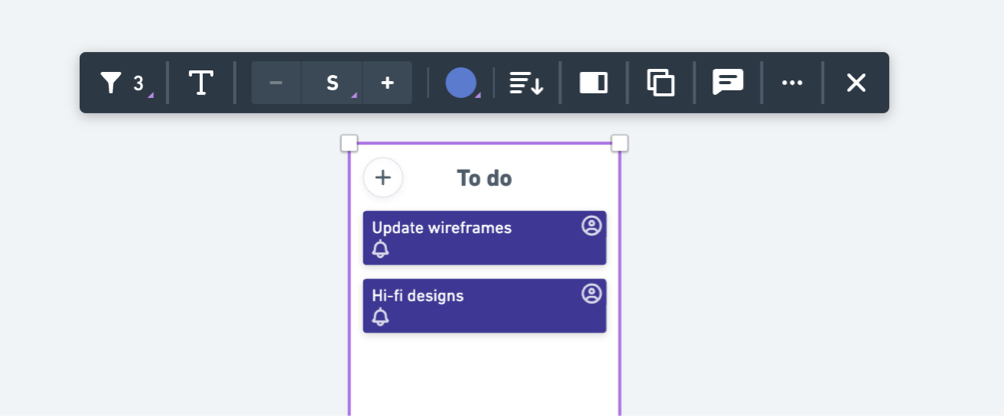
When you create or select a stack, there are a set of customization options available in the toolbar, including:
- Setting the default size for tasks added to the stack (small, medium or large)
- Opening the stack in a sidebar
- Choosing a default color for cards created in the stack
- Sorting options for the tasks in the stack, such as sorting by newest, oldest, latest comments, most comments, and most votes
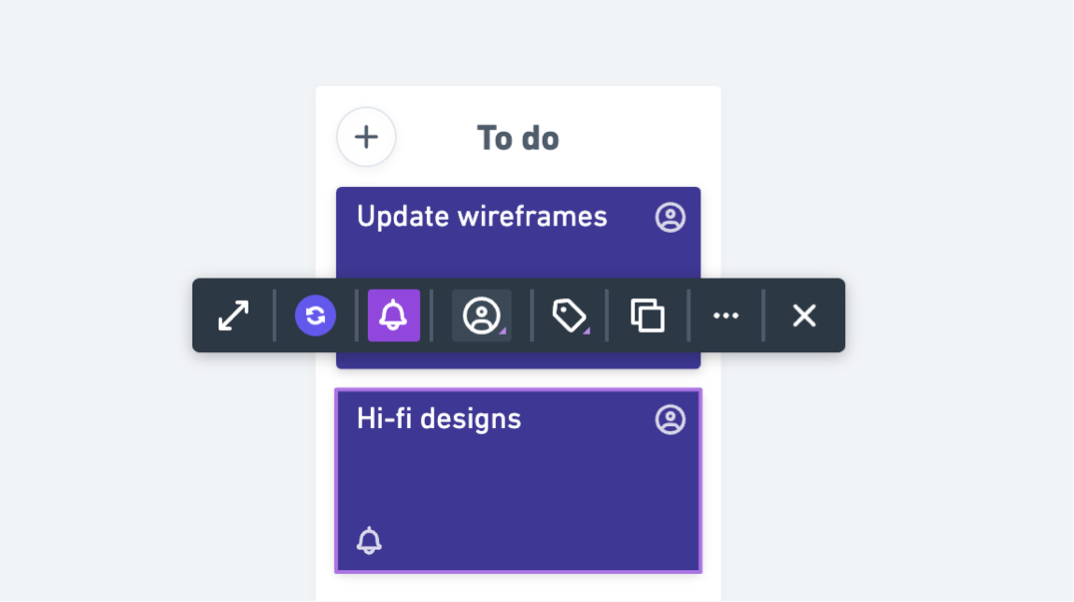
When you create a new task or select an existing task(shift + click) , you get similar options in the toolbar:
- Enable or disable notifications for comments/status changes on the task
- Assign the task to yourself or a teammate
- Add or remove tags
- Duplicate the card
Importing and exporting stacks of tasksCopied!Link to this section
To export a stack of tasks as a bulleted text list:
- Select the stack
- Copy it
- Paste it as plain text (sometimes called paste special) with
Command+Shift+V(Mac) orControl+Shift+V(PC).
You can also import a text list (from Whimsical, or elsewhere) and convert it to a stack of tasks:
- Copying it
- Select a stack
- Paste it with
Command+V(Mac) orControl+V(PC).
Expanding task cardsCopied!Link to this section
Once you open a task card, you can add a more detailed description with different formatting options, such as images, links, and checklists
Pro tip: You can also embed Whimsical boards, or other tasks. 👌
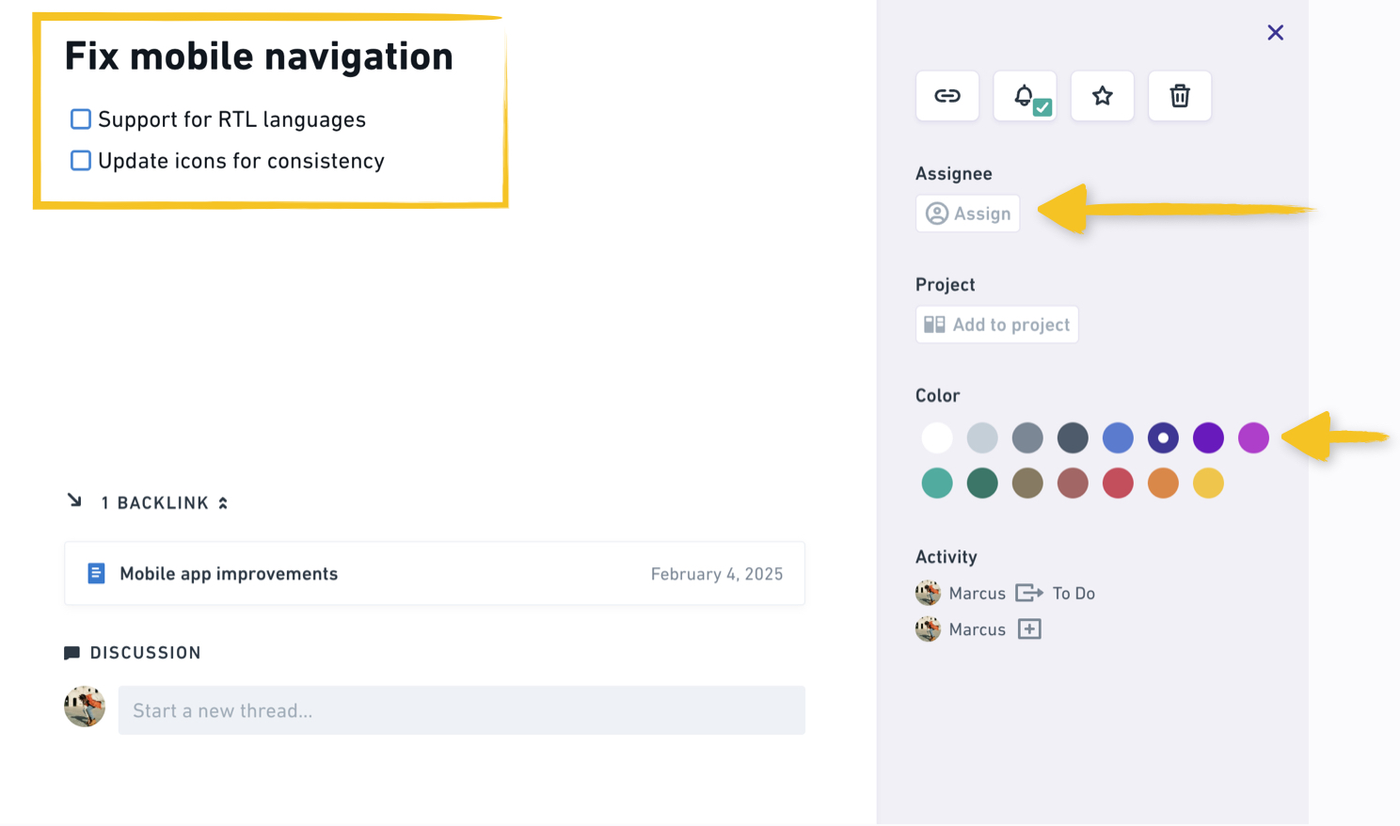
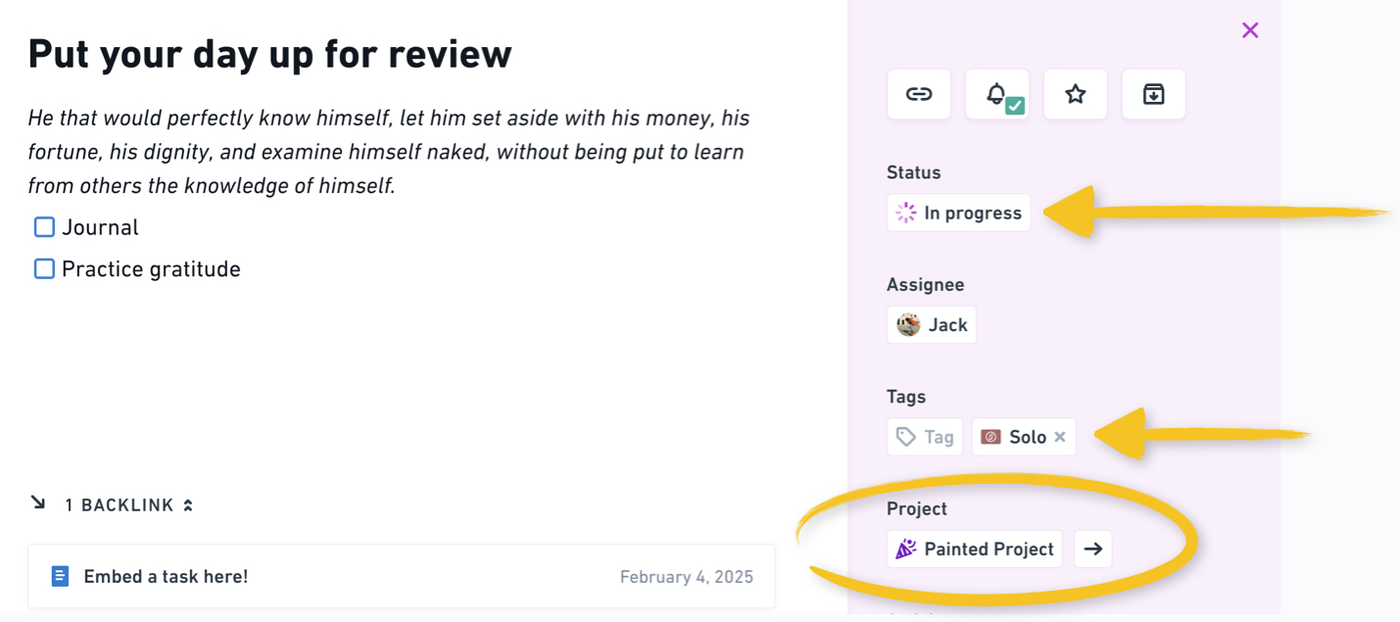
You can also delete the card, assign it to a teammate, change its color, link it to a project, or start a discussion about it:
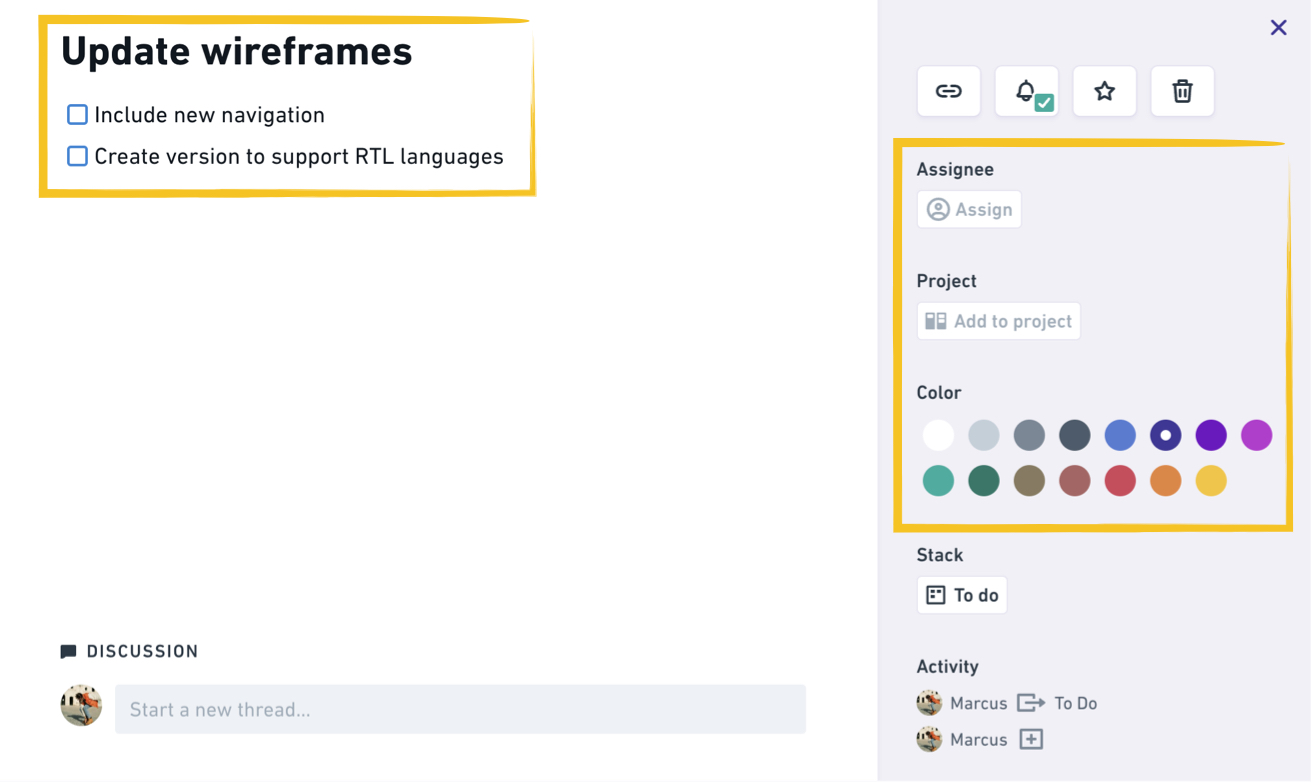
If you choose to add the task to a project, it will appear here in the board and in the tasks view for that project. Once added to a project, you’ll see two new options:
- Add tags - choose from the project’s existing tags, or create new ones.
- Change the status - Your choice of status will also update the color of the task card.
Any changes made in one place (like status etc) will be reflected in both the project and the doc.
Tasks will show the name of the stack they’re in on this board (if they’re in one) and can be moved to other stacks with this drop down:

Important: This is independent from their status column on the project’s tasks view
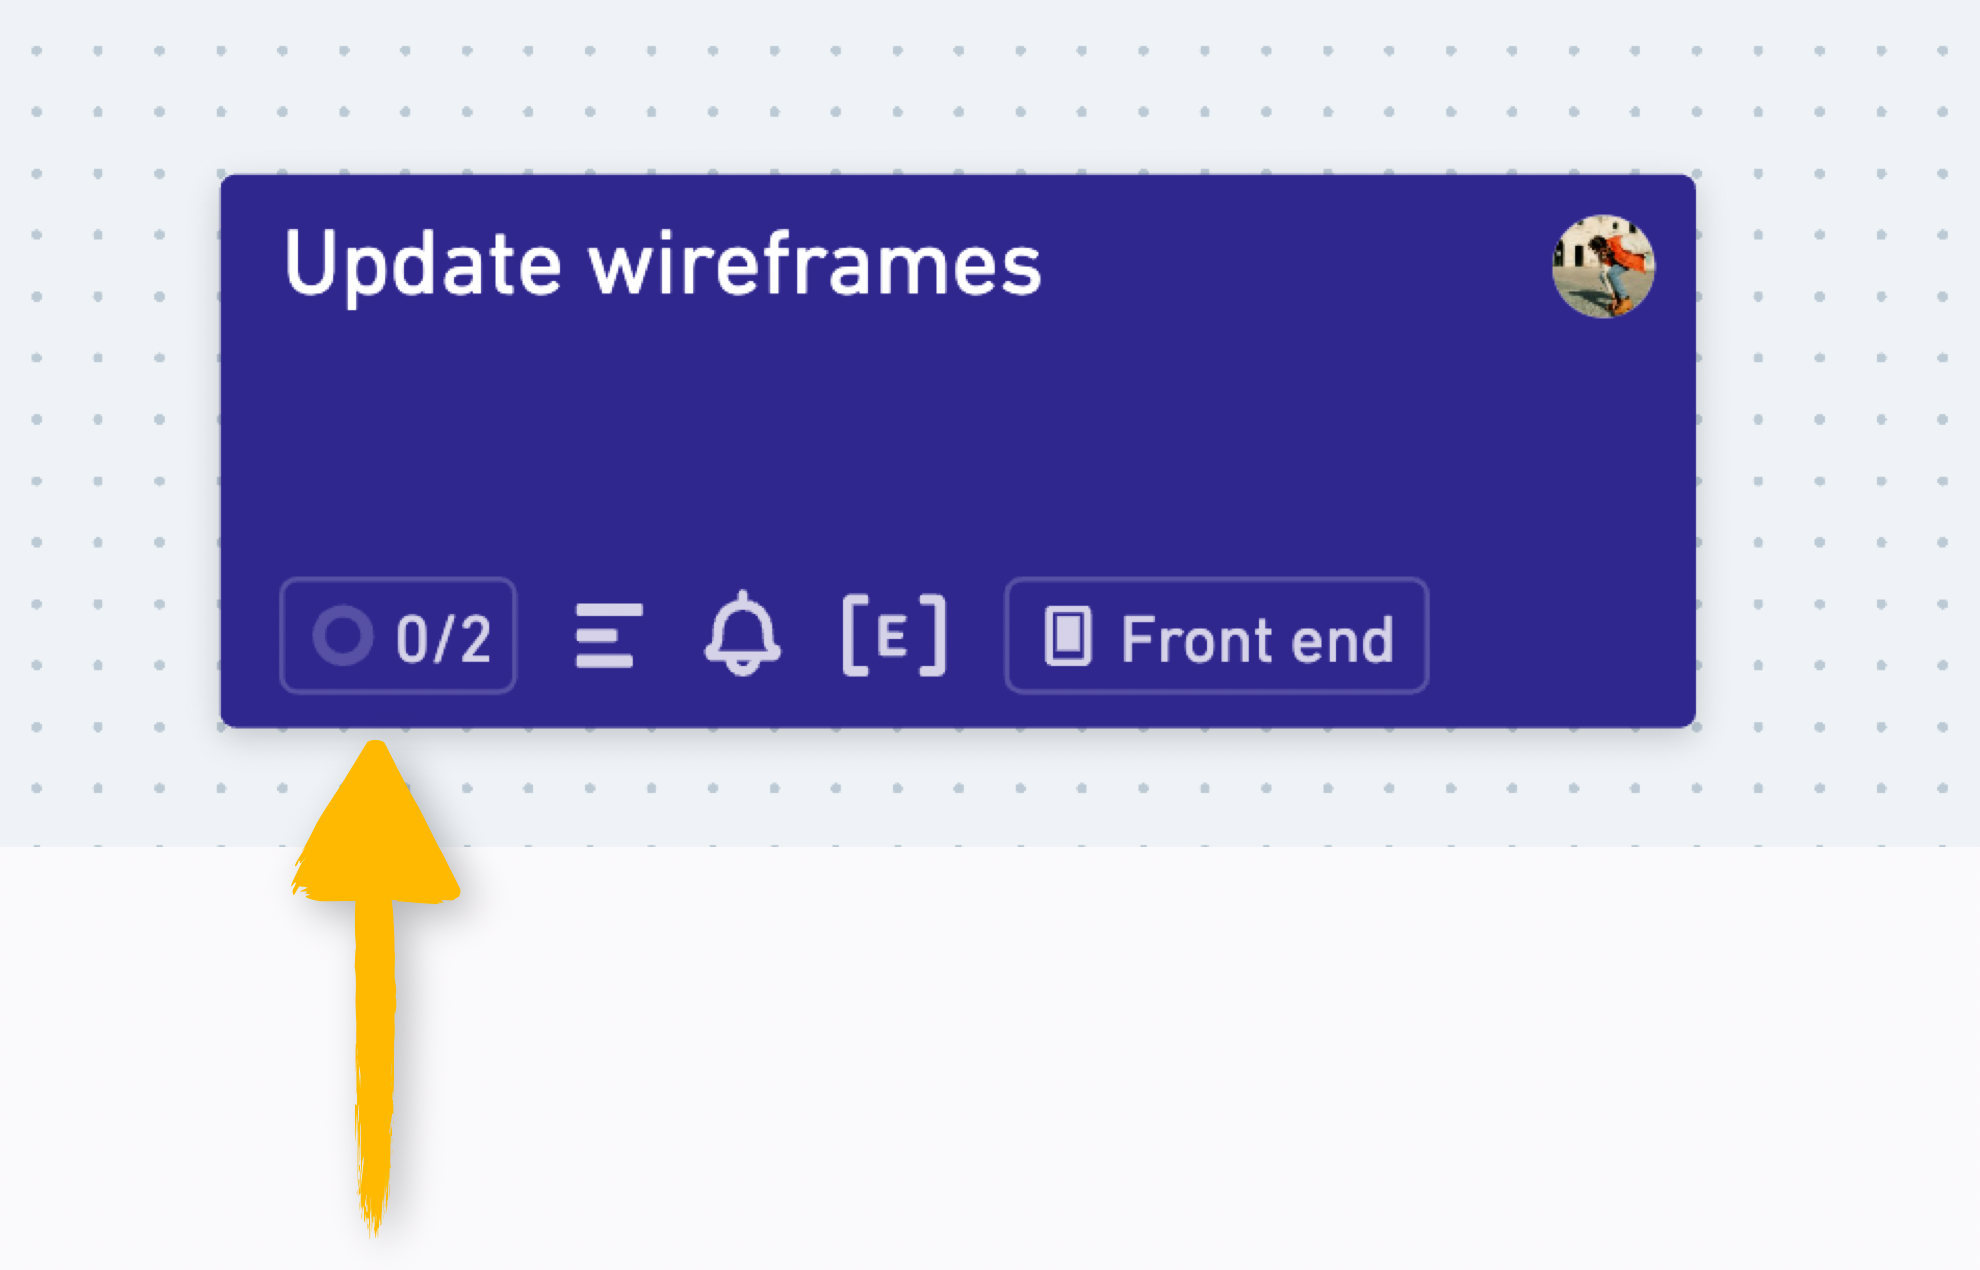
Task progress and checklistsCopied!Link to this section
When you add a checklist to your task, you'll see an indicator on the front of the card showing progress through the list: