- What is Whimsical?
- Getting started with flowcharts
- Getting started with mind maps
- Getting started with wireframes
- Getting started with docs
- What can you do with Whimsical?
- Using Whimsical Boards
- Getting to know Whimsical - video guide 🎥
- Working with Whimsical’s infinite canvas - video guide 🎥
- 5 ways to create a new file
- Getting started with Whimsical AI
- How to create a new workspace
- How to use AI-assisted mind mapping
- Customizing file and folder icons
- Mentions in Whimsical files
- Customizing diagram shapes
- Getting started with sequence diagrams
- Commenting in Whimsical files
- Getting started with flowcharts
- Getting started with mind maps
- Getting started with wireframes
- Using Whimsical Boards
- Mentions in Whimsical files
- Customizing diagram shapes
- Using sections on the Whimsical canvas
- Sketch on the canvas with freehand drawing
- Annotating files for more detail
- Text-to-object pasting options
- Adding and displaying links in Whimsical files
- Linking to sections and objects
- How to draw a line
- How to filter selected objects
- Presenting in Whimsical
- Voting on task cards and sticky notes
- Using the timer in boards
- Working with the grid and auto-alignment
- Working with connectors
- Does Whimsical have cloud architecture icons?
- Using tables in Whimsical
- Using sticky notes in boards
- Optimizing performance in larger files
- Embedding external content into Whimsical
- Using spellcheck
- Setting custom thumbnails
- How overlays work in Wireframe mode
- Hiding cursors while collaborating
- Measure between objects in Boards
- Uploading files to Whimsical
- Getting started with sequence diagrams
- Commenting in Whimsical files
- Getting started with docs
- Mentions in Whimsical files
- Text-to-object pasting options
- Adding and displaying links in Whimsical files
- Linking to sections and objects
- Using tables in Whimsical
- Embedding external content into Whimsical
- Using spellcheck
- Changing page width and text size in Docs
- Collapsing text with toggles
- How to create a new workspace
- Requesting file access
- Workspace discovery settings
- Sorting files and folders
- Changing workspace members’ roles
- Adding and removing members
- Creating and managing teams
- Requesting workspace editor access
- Linking between files
- Member roles in Whimsical
- How to delete a workspace
- How to upgrade your workspace
- Guest access
- Renaming your workspace
- Offboarding users
- Consolidating workspaces
- Uploading files to Whimsical
- Organizing your work with tabbed folders
- SAML
- Setting up SAML session expiry
- Security
- Prevent new workspace creation
- Customizing file and folder icons
- How to draw a line
- How to filter selected objects
- Does Whimsical have cloud architecture icons?
- How overlays work in Wireframe mode
- Moving and copying files
- Using Whimsical on mobile
- Does Whimsical have a dark mode?
- File version history
- Why are the colors of some elements toned down?
- Does Whimsical support offline mode?
- Teams, workspaces & sections explained
- Does Whimsical work on iPad?
- Free viewers commenting in workspaces
- Syntax highlighting in code blocks
- Whimsical desktop app
- Is Whimsical available in other languages?
- Inverting the zoom direction in Whimsical so it works more like Sketch
- Troubleshooting issues and reporting bugs
- How to add emojis
- Team FAQs
- How to restore deleted files from the trash
- Searching in your Whimsical workspace
- Organizing files in your workspace
- I’ve upgraded but still don’t have access to the paid features
- Why can't I edit my files?
- Reporting content in Whimsical
- Does Whimsical have an affiliate or referral program?
- Collaborating with others in real time
- Sharing files and managing access permissions
- Hiding cursors while collaborating
- How to switch between workspaces
- Sharing feedback and feature requests
- Embedding & integrating boards with Jira Issues
- Integrating Whimsical with Google Docs
- Embedding files in ClickUp views
- Embedding files in Asana
- Embedding Whimsical files
- Whimsical AI Diagrams for ChatGPT
- Creating Jira & Confluence Smart Links for Whimsical Files
- Embedding files in Guru
- Embedding files in Trello
- Embedding & integrating boards in Notion
- Integrating Whimsical and GitHub
- Embedding files in Zendesk
- Support Whimsical embeds in your app with EmbedKit
- Whimsical previews and notifications in Slack
- Embedding files in Canva
- Integrating Whimsical and Linear
- Embedding files in Nuclino
- Embedding files in Monday
- Embedding files in Medium
- Embedding files in Slab
- Embedding files in Coda
- Whimsical API (Beta)
- SAML
- SAML SSO in Whimsical
- SAML SSO with Okta
- SAML SSO with Auth0
- SAML SSO with OneLogin
- SAML SSO with Microsoft Entra ID (Azure AD)
- SAML SSO with Google Workspace (previously G-Suite)
- SAML SSO with Active Directory Federation Services (ADFS)
- SAML SSO with other identity providers
- Setting up SAML session expiry
- Managing email changes with SAML and SCIM
- SCIM
- Setting up SCIM with Okta
- Setting up SCIM with JumpCloud
- Setting up SCIM with Entra ID (Azure AD)
- SCIM provisioning with Groups in Okta
- SCIM user provisioning in Whimsical
- SCIM provisioning with Groups in Entra ID (Azure AD)
- Security
- Setting up Two-factor Authentication (2FA)
- Prevent new workspace creation
- Whitelisting Whimsical domains
- Signing in with your Whimsical account on multiple devices
- Contact us
Using tables in Whimsical
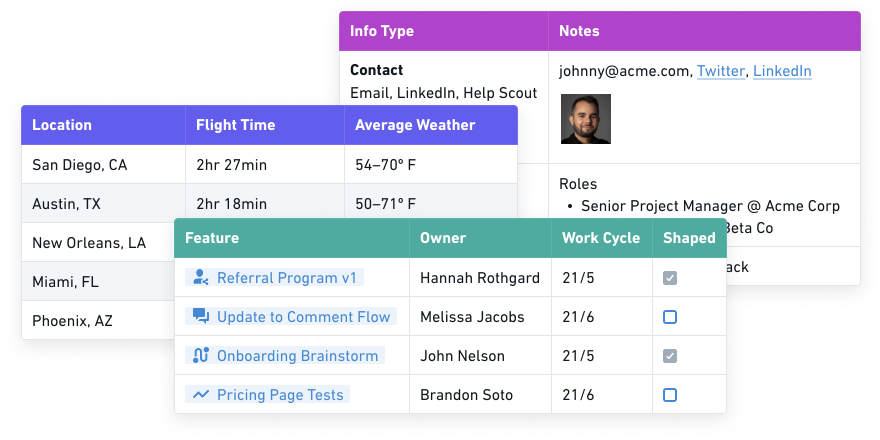
If you ever need to add a little structure to a Whimsical file, you can add tables to your docs, tasks, and boards. Tables are perfect for organizing product roadmaps, comparing feature specs, tracking project timelines and more
Tables in DocsCopied!Link to this section
To add a table to a Whimsical doc:
- Go to the start of a new paragraph and type
/table - Use the block handle to open the menu and scroll down to Table

Tip: You can also paste a table directly from Google Sheets, Numbers, or Excel 😉
Adding rows and columnsCopied!Link to this section
To add rows or columns:
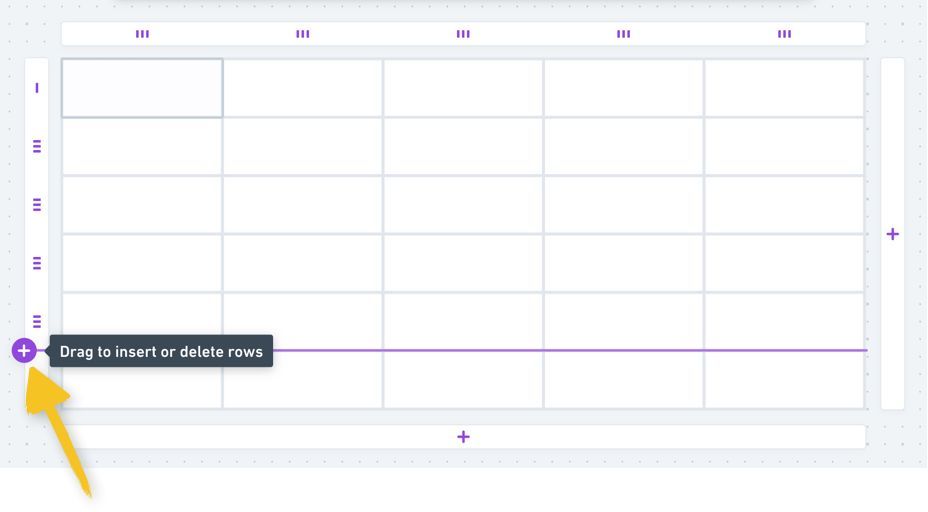
- Click the plus icon (+) that appears on the sides of the table
- To add one or multiple rows or columns, drag the plus icon (+)
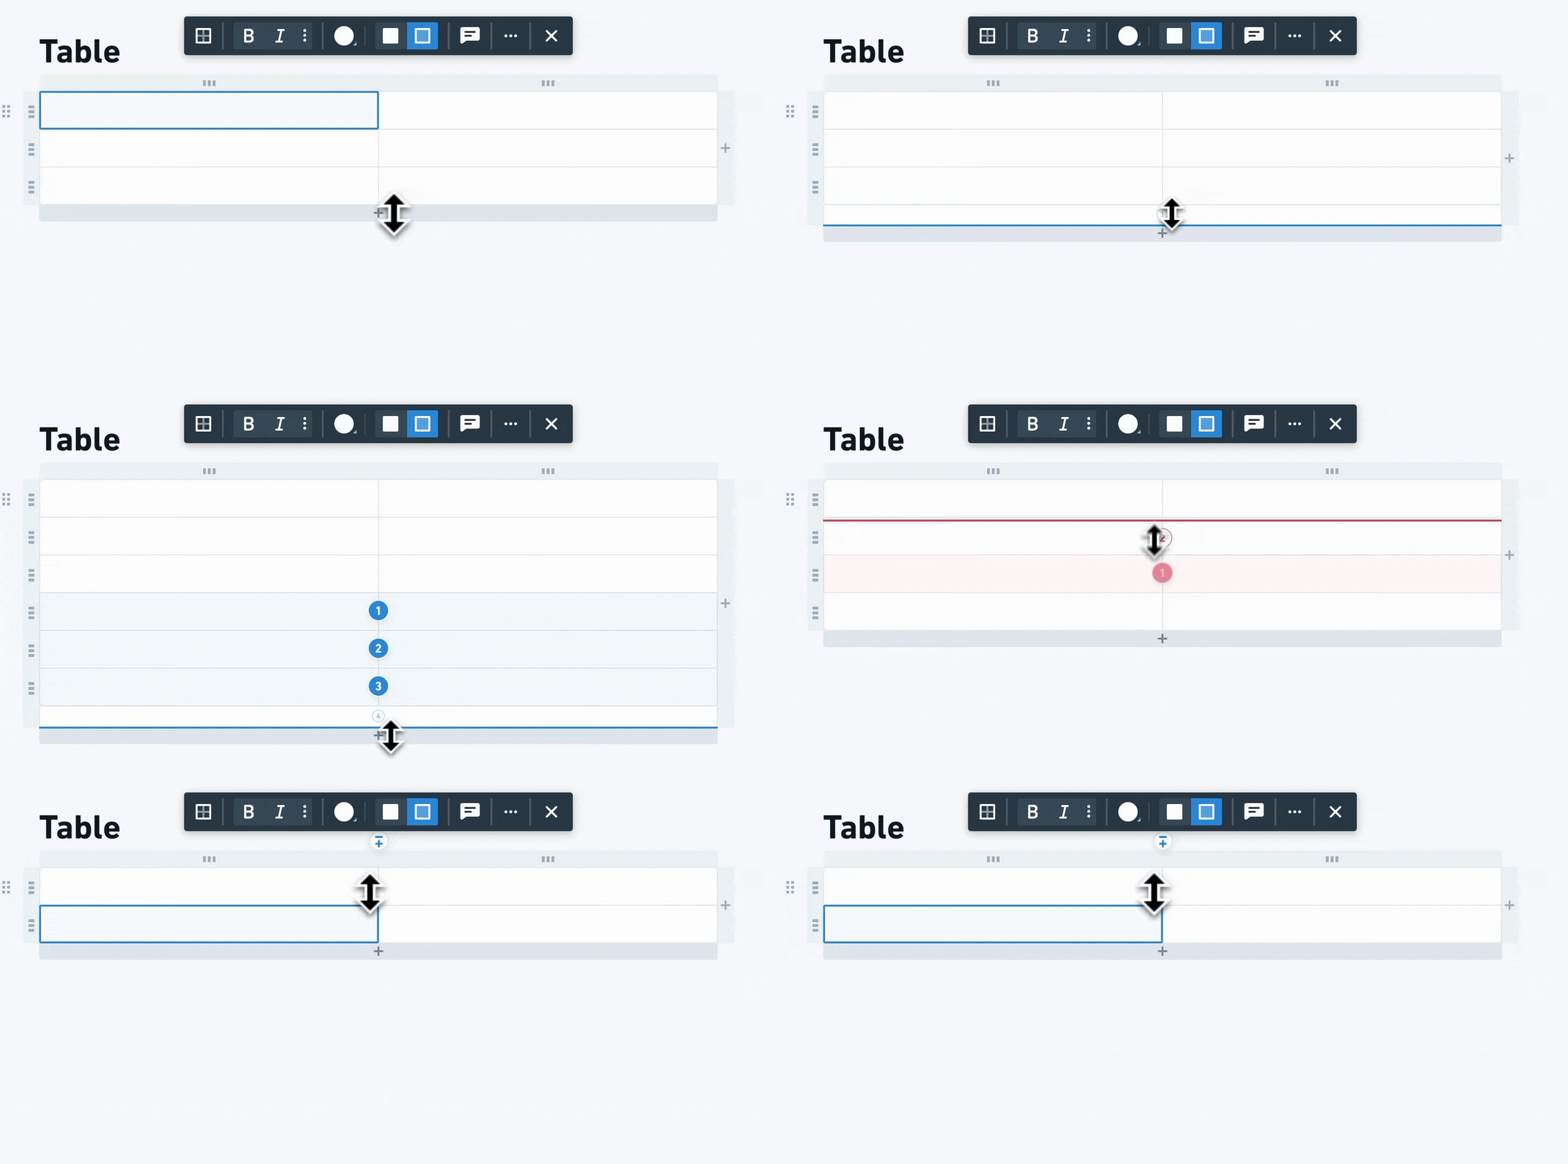
- Use the keyboard shortcut
Command+Enter(Mac) orControl+Enter(PC) to add a row below when the adjacent row is selected - Use the keyboard shortcut
Command+Option+Enter(Mac) orControl+Alt+Enter(PC) to add a column to the right when the adjacent column is selected
To remove a row or column:
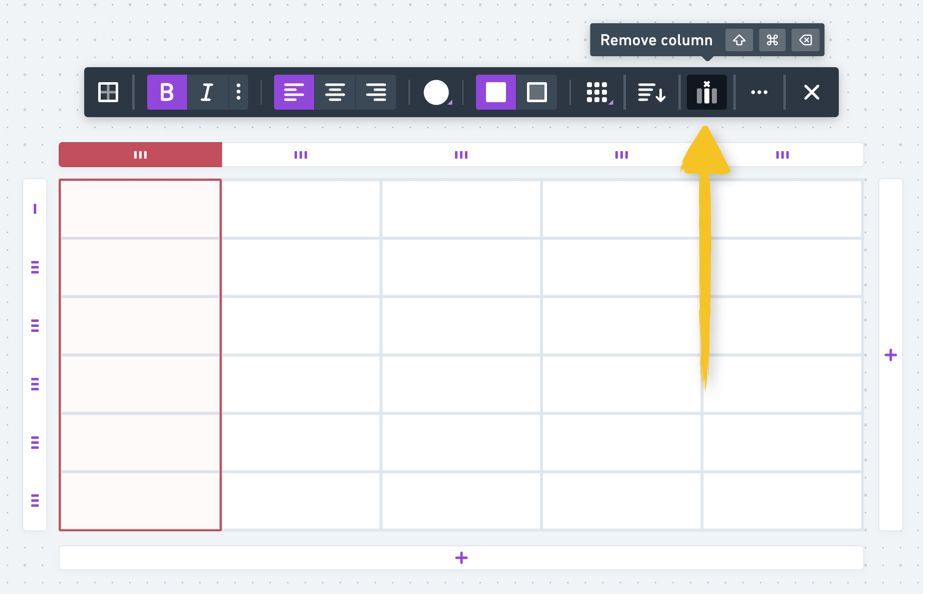
- Select it using the handle at the top or the right, then click Remove row or Remove column from the toolbar:

- Use the keyboard shortcut
Command+Delete(Mac) orControl+Delete(PC) to delete a row, or Command+Shift+Delete(Mac) orControl+Alt+Backspace(PC) to delete a column- To add one or multiple rows or columns, drag the plus icon (+)

Organizing rows and columnsCopied!Link to this section
You can organize your rows and columns by dragging and dropping them using the handles on the top or the right.
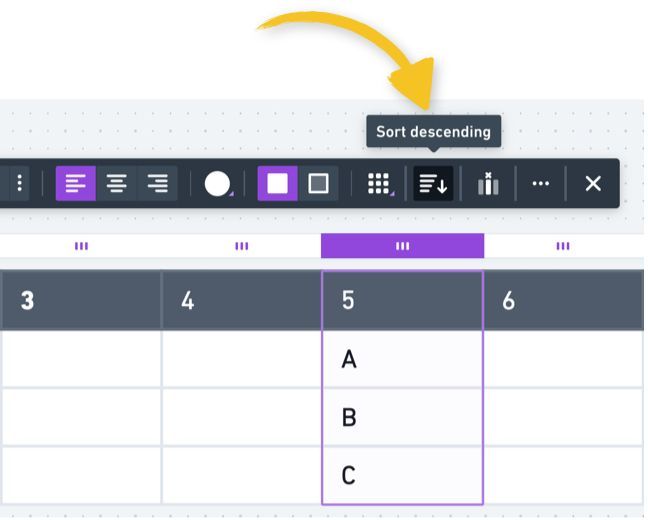
You can also sort the contents in ascending or descending order using the icon in the toolbar:

Formatting tablesCopied!Link to this section
When you have a table, column, row or cell selected, the toolbar will show all the formatting options. They include:
- Background color
- Adding or removing a header row
- Choosing the table style
- Adding or removing rows and columns
Tip: Whimsical table cells support rich content. Try pasting in an image, or using @ to mention a Whimsical file.
Tables in BoardsCopied!Link to this section
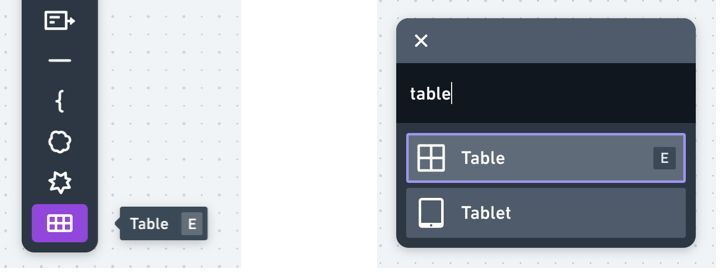
To add a table to a Whimsical board, use the keyboard shortcut E , select it from the diagram shapes menu, or type / then table :
Tip: You can also paste a table directly from Google Sheets, Numbers, or Excel 😉
Click and drag the table to choose your starting size, and the number of columns and rows:

Adding and removing columns and rowsCopied!Link to this section
To add a single column or row, click the + icon on the right or bottom edge of the table:
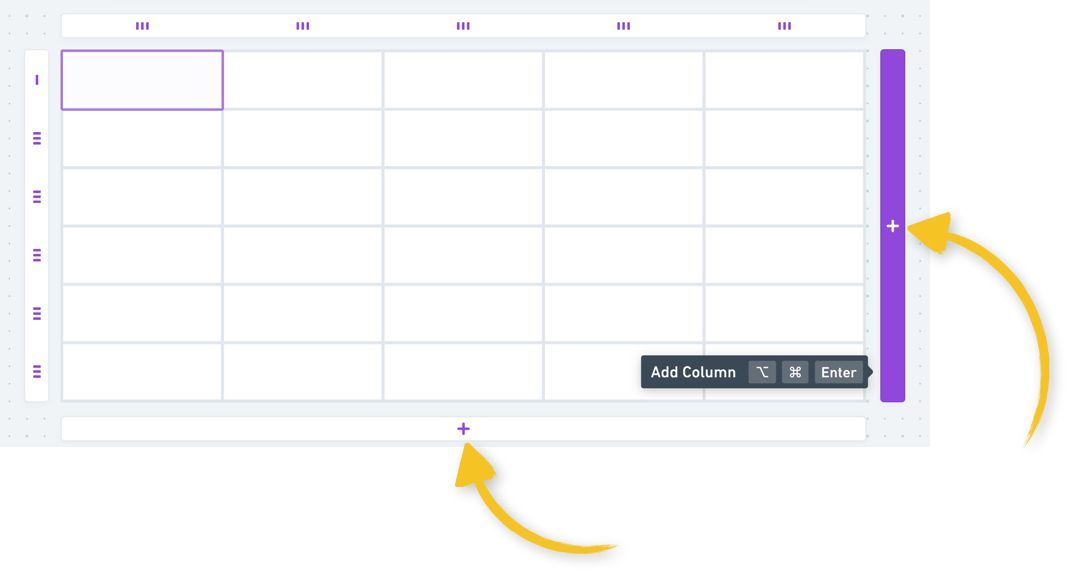
Tip: You can also add columns or rows in between existing ones, with this plus icon:
To remove a column or row, select it then click "remove column" or use the keyboard shortcut Command + Shift + Delete (Mac) or Control + Alt + Backspace (PC):
To add or remove multiple columns or rows, click and drag any of the + buttons mentioned above:

Organizing columns and rowsCopied!Link to this section
Organize your rows and columns by dragging them with the handles on the top and left:

You can also sort the contents in ascending or descending order with this icon in the toolbar:
Formatting tablesCopied!Link to this section
When you have a table, column, row or cell selected, you'll see the following formatting options:
- Background color
- Adding or removing a header row
- Choosing the table style (e.g. alternating row colors)
Tip: Whimsical table cells support rich content. Try pasting in an image, or using @ to mention a Whimsical file.
Connectors and tablesCopied!Link to this section
When you connect to a table from another shape in your board, you'll see purple outline as a guide so you can choose to connect to the table as a whole, or to an individual cell:

Note:
- Tables in boards, tasks and docs are compatible, so you can paste anything you like from one into the other.
- Formulas and calculations are not supported.
