- What is Whimsical?
- Getting started with flowcharts
- Getting started with mind maps
- Getting started with wireframes
- Getting started with docs
- What can you do with Whimsical?
- Using Whimsical Boards
- Getting to know Whimsical - video guide 🎥
- Working with Whimsical’s infinite canvas - video guide 🎥
- 5 ways to create a new file
- Getting started with Whimsical AI
- How to create a new workspace
- How to use AI-assisted mind mapping
- Customizing file and folder icons
- Mentions in Whimsical files
- Customizing diagram shapes
- Getting started with sequence diagrams
- Using the command menu
- Commenting in Whimsical files
- Getting started with flowcharts
- Getting started with mind maps
- Getting started with wireframes
- Using Whimsical Boards
- Mentions in Whimsical files
- Customizing diagram shapes
- Using sections on the Whimsical canvas
- Sketch on the canvas with freehand drawing
- Annotating files for more detail
- Text-to-object pasting options
- Adding and displaying links in Whimsical files
- Linking to sections and objects
- How to draw a line
- How to filter selected objects
- Presenting in Whimsical
- Voting on task cards and sticky notes
- Using the timer in boards
- Working with the grid and auto-alignment
- Working with connectors
- Does Whimsical have cloud architecture icons?
- Using tables in Whimsical
- Using sticky notes in boards
- Optimizing performance in larger files
- Embedding external content into Whimsical
- Using spellcheck
- Setting custom thumbnails
- How overlays work in Wireframe mode
- Hiding cursors while collaborating
- Measure between objects in Boards
- Uploading files to Whimsical
- Getting started with sequence diagrams
- Commenting in Whimsical files
- Getting started with docs
- Mentions in Whimsical files
- Text-to-object pasting options
- Adding and displaying links in Whimsical files
- Linking to sections and objects
- Using tables in Whimsical
- Embedding external content into Whimsical
- Using spellcheck
- Changing page width and text size in Docs
- Collapsing text with toggles
- How to create a new workspace
- Requesting file access
- Workspace discovery settings
- Sorting files and folders
- Changing workspace members’ roles
- Adding and removing members
- Creating and managing teams
- Requesting workspace editor access
- Linking between files
- Member roles in Whimsical
- How to delete a workspace
- How to upgrade your workspace
- Guest access
- Renaming your workspace
- Offboarding users
- Consolidating workspaces
- Uploading files to Whimsical
- Organizing your work with tabbed folders
- SAML
- Setting up SAML session expiry
- Security
- Prevent new workspace creation
- Customizing file and folder icons
- How to draw a line
- How to filter selected objects
- Does Whimsical have cloud architecture icons?
- How overlays work in Wireframe mode
- Moving and copying files
- Using Whimsical on mobile
- Does Whimsical have a dark mode?
- File version history
- Why are the colors of some elements toned down?
- Does Whimsical support offline mode?
- Teams, workspaces & sections explained
- Does Whimsical work on iPad?
- Free viewers commenting in workspaces
- Syntax highlighting in code blocks
- Whimsical desktop app
- Is Whimsical available in other languages?
- Inverting the zoom direction in Whimsical so it works more like Sketch
- Troubleshooting issues and reporting bugs
- How to add emojis
- Team FAQs
- How to restore deleted files from the trash
- Searching in your Whimsical workspace
- Organizing files in your workspace
- I’ve upgraded but still don’t have access to the paid features
- Why can't I edit my files?
- Reporting content in Whimsical
- Does Whimsical have an affiliate or referral program?
- Collaborating with others in real time
- Sharing files and managing access permissions
- Hiding cursors while collaborating
- How to switch between workspaces
- Sharing feedback and feature requests
- Embedding & integrating boards with Jira Issues
- Integrating Whimsical with Google Docs
- Embedding files in ClickUp views
- Embedding files in Asana
- Embedding Whimsical files
- Whimsical AI Diagrams for ChatGPT
- Creating Jira & Confluence Smart Links for Whimsical Files
- Embedding files in Guru
- Embedding files in Trello
- Embedding & integrating boards in Notion
- Integrating Whimsical and GitHub
- Embedding files in Zendesk
- Support Whimsical embeds in your app with EmbedKit
- Whimsical previews and notifications in Slack
- Embedding files in Canva
- Integrating Whimsical and Linear
- Embedding files in Nuclino
- Embedding files in Monday
- Embedding files in Medium
- Embedding files in Slab
- Embedding files in Coda
- Whimsical API (Beta)
- SAML
- SAML SSO in Whimsical
- SAML SSO with Okta
- SAML SSO with Auth0
- SAML SSO with OneLogin
- SAML SSO with Microsoft Entra ID (Azure AD)
- SAML SSO with Google Workspace (previously G-Suite)
- SAML SSO with Active Directory Federation Services (ADFS)
- SAML SSO with other identity providers
- Setting up SAML session expiry
- Managing email changes with SAML and SCIM
- SCIM
- Setting up SCIM with Okta
- Setting up SCIM with JumpCloud
- Setting up SCIM with Entra ID (Azure AD)
- SCIM provisioning with Groups in Okta
- SCIM user provisioning in Whimsical
- SCIM provisioning with Groups in Entra ID (Azure AD)
- Security
- Setting up Two-factor Authentication (2FA)
- Prevent new workspace creation
- Whitelisting Whimsical domains
- Signing in with your Whimsical account on multiple devices
- Contact us
Getting started with docs
If you prefer a quick video guide, this one covers all the docs basics in 1 minute:
Otherwise, read on! 🧑🏫
FormattingCopied!Link to this section
Most formatting options can be applied with markdown (you can even paste markdown directly into a doc), or to select a block type from the block menu type / in a new line.
Docs also support standard formatting Keyboard shortcuts which are great if you prefer to add style to your doc as you type.
If you prefer to use the cursor, you'll find out how to change text formatting below. 👇
Formatting textCopied!Link to this section
Select the text that you want to format and then choose one of the options from the toolbar:

Changing block typeCopied!Link to this section
To add a new block or transform one type of block into another click the icon on the left of the text or line ( 1), or use the toolbar (2):
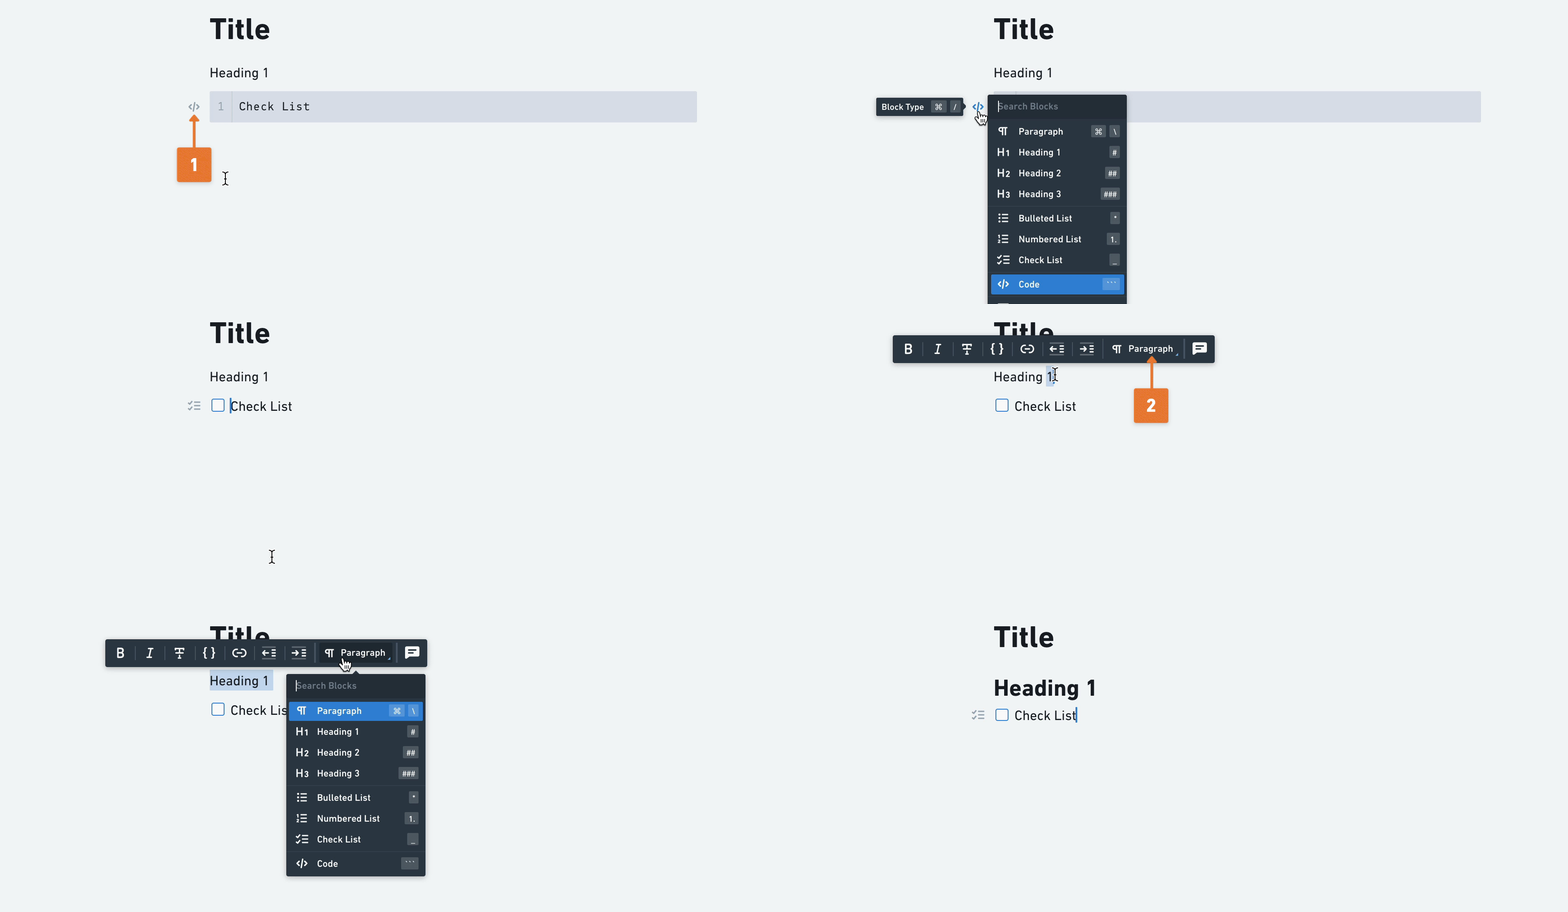
Tip: Drag and drop blocks to new locations with the same icon on the left. 👌
Embedding, nesting and linking files in a docCopied!Link to this section
Creating a nested fileCopied!Link to this section
You can nest a file in your doc in the following ways:
- Create a nested board or doc with the
+sign next to the doc's title in the sidebar. - When typing in a doc, open the "block type" menu and select the type of file you'd like to add.
- Drag & drop an existing file under the doc from the sidebar.

If you don't want an existing file to be nested in the doc but still want to link it, type @ and start typing its name:

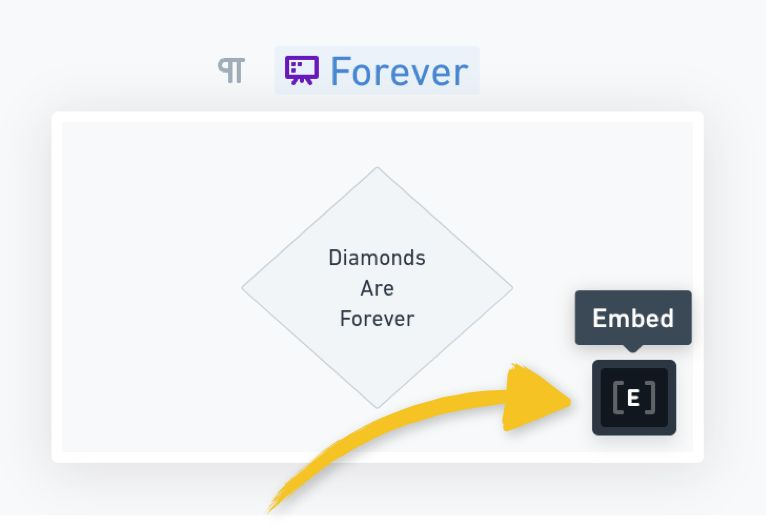
Pro tip: After linking to a file this way, you can hover over it and click the [E] icon to switch it to an embed:
Hierarchy and navigationCopied!Link to this section
The breadcrumb trail at the top left of your document shows you which files are nested within each other.
Right now, only two levels of hierarchy are displayed: the title of the file you're working in (on the right), and its parent (on the left):

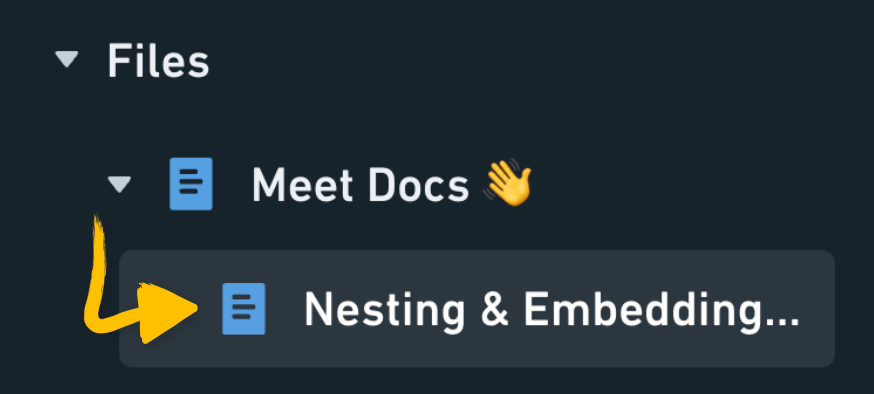
You'll also be able to see which docs are nested within each other in the sidebar:
Deleting or moving a nested docCopied!Link to this section
To delete a nested doc, click the three dots menu in the upper-right corner:

You can delete the doc from that menu, or show a list of all deleted nested files. You can then permanently delete the files or restore them:

If you want to "un-nest" a doc, drag and drop it out of the parent doc in the sidebar.
Embedding in docsCopied!Link to this section
While some things are better said than drawn, a picture is still worth a thousand words. Currently we support embeds from:
- Figma
- Airtable
- Loom
- Youtube
- Vimeo
- Canva
- Hex
- CodePen
- Any Whimsical board or doc
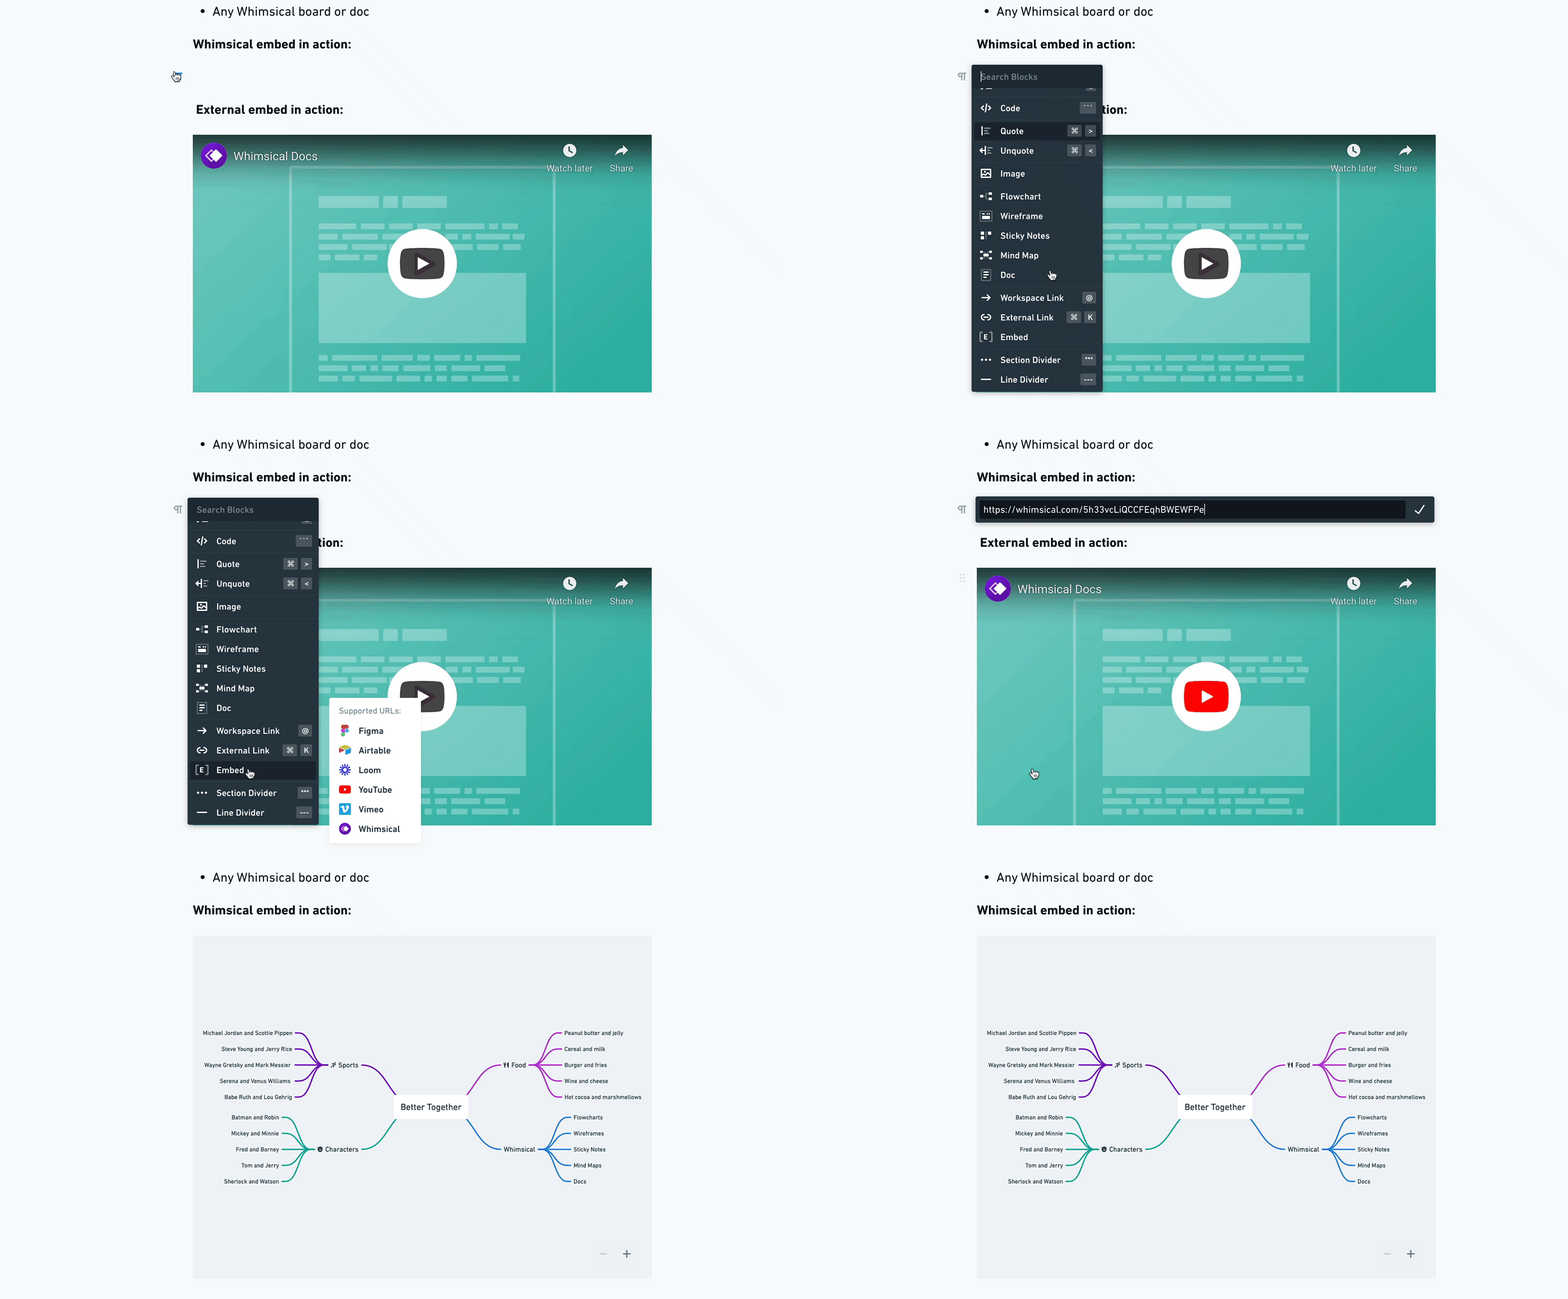
To add an embed, click Add block → Embed → paste the embed link and hit Enter:
Sharing and collaboratingCopied!Link to this section
Sharing a docCopied!Link to this section
Click Share in the top right corner, to copy a shareable link, or invite people to access your file:
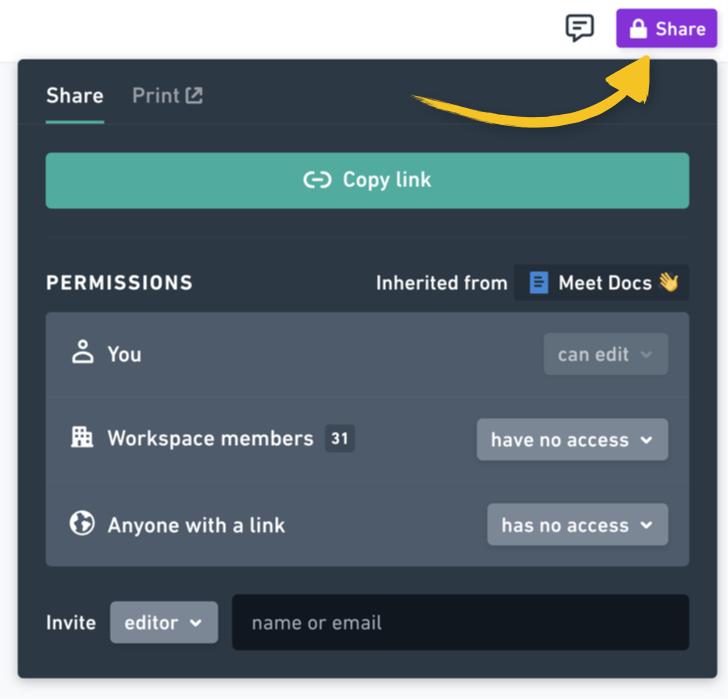
Learn more about sharing files in this article.
Note: Nested files inherit sharing settings of the doc they are nested in.
Collaborating on a docCopied!Link to this section
You can collaborate on a doc with users in your workspace if the file is in the Team section of your Workspace.
Find out more about Managing access permissions.
See who is viewing or editing the DocCopied!Link to this section
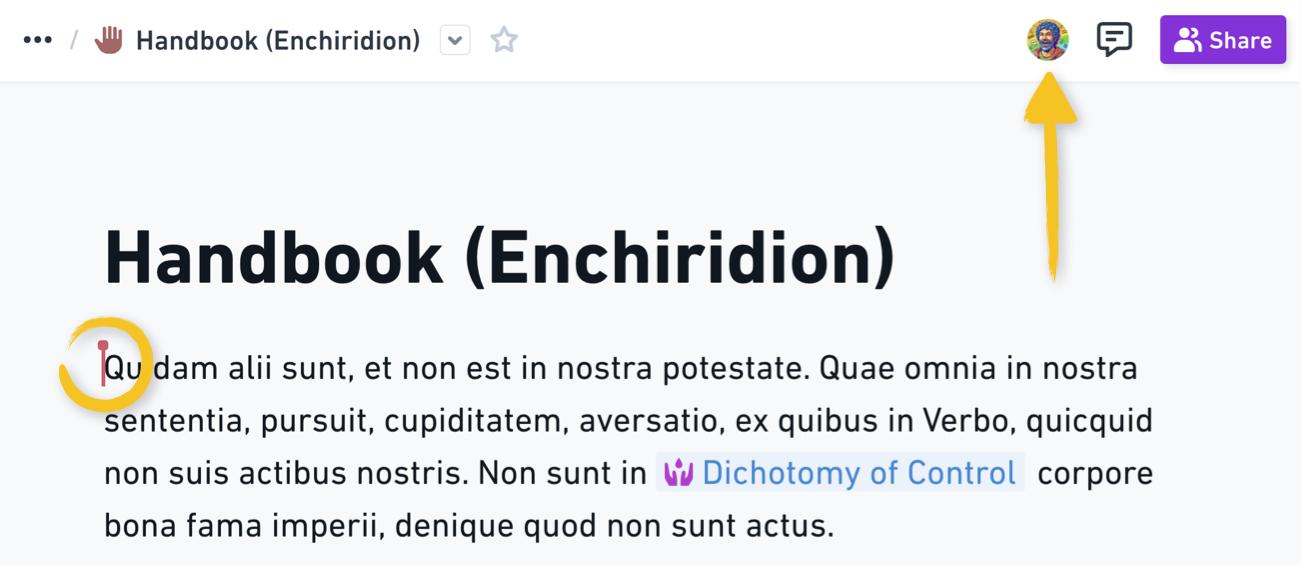
To see who has the doc open, check the upper-right corner of the screen. You'll see the avatar of anyone else viewing the doc.
If somebody is editing the doc, you'll see a colored cursor with their name and the doc will be updated in realtime:
Restoring a Doc
You can restore the contents of a Doc with version history. Read this article to find out how.
Docs keyboard shortcutsCopied!Link to this section
There are keyboard shortcuts we all know, love and use (think copy, paste, cut, delete, etc.) and they can be used in Whimsical Docs as well. Here's a list of keyboard and markdown shortcuts that are perhaps a bit less known but worth remembering:
ACTION | SHORTCUT |
|---|---|
Paragraph |
|
Heading 1 |
|
Heading 2 |
|
Heading 3 |
|
Bulleted list |
|
Numbered list |
|
Checklist |
|
Section divider |
|
Line divider |
|
Change block type |
|
Bold |
|
Italic |
|
Code block |
|
Open syntax highlighter (while editing code block) |
|
Inline code |
|
Strikethrough |
|
Link |
|
Highlight text |
|
Quote |
|
Decrease indent |
|
Increase indent |
|
Workspace link |
|
External link |
|
Comment |
|
Select text |
|
Select all |
|
Open nested file |
|
Go to parent file |
|
Insert table row |
|
Insert table column |
|
Remove table row |
|
Remove table column |
|
Copy link to block |
|
ACTION | SHORTCUT |
|---|---|
Toggle block and all descendants |
|
Toggle block and all siblings |
|
Toggle block, siblings, and descendants |
|
Expand block |
|
Collapse block |
|
Looking for Windows/PC shortcuts?
FocusCopied!Link to this section
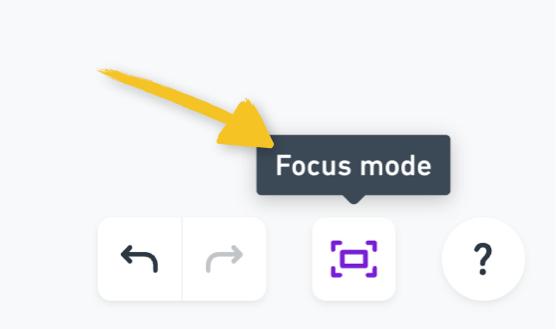
Try enabling Focus mode (bottom-right corner) to avoid any distractions and concentrate on the doc and nothing else.
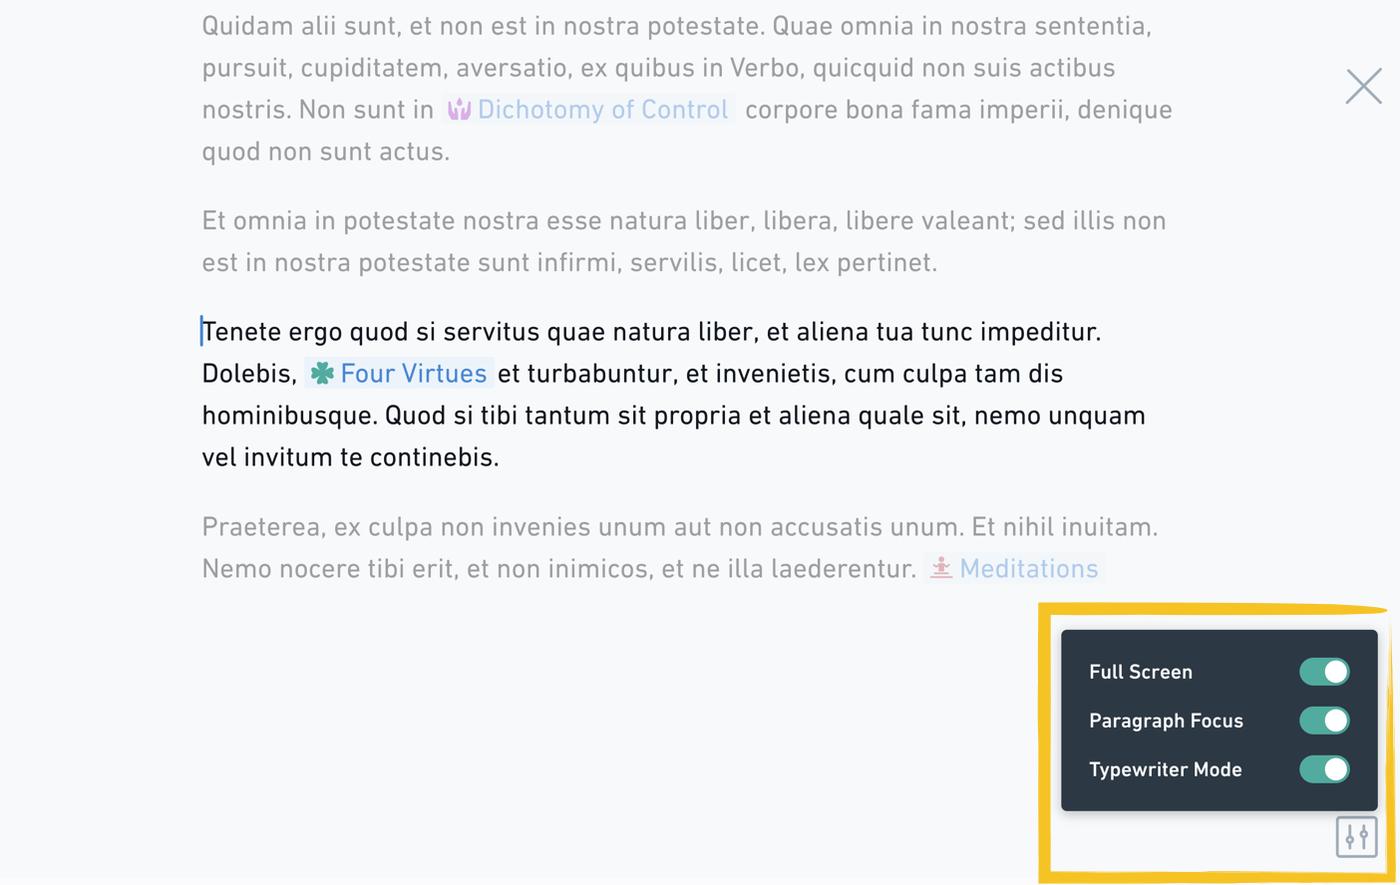
Once you enable Focus Mode, you can also customize your preferences:
Full Screen- if enabled, will enter into full screen mode. Can be disabled by pressingEsc.Paragraph Focus- if enabled, will highlight the paragraph where your cursor is located.Typewriter Mode- if enabled, will keep the paragraph where your cursor is located in the middle of the screen at all times.
Document width and text sizeCopied!Link to this section
If you find it more comfortable to read in a wider document or write text in a smaller size, you can change the text size and layout in your docs. This article explains how.
Summary
- Getting started with docs
- Formatting
- Formatting text
- Changing block type
- Embedding, nesting and linking files in a doc
- Creating a nested file
- Hierarchy and navigation
- Deleting or moving a nested doc
- Embedding in docs
- Sharing and collaborating
- Sharing a doc
- Collaborating on a doc
- See who is viewing or editing the Doc
- Docs keyboard shortcuts
- Focus
- Document width and text size
