- What is Whimsical?
- Getting started with flowcharts
- Getting started with mind maps
- Getting started with wireframes
- Getting started with docs
- What can you do with Whimsical?
- Using Whimsical Boards
- Getting to know Whimsical - video guide 🎥
- Working with Whimsical’s infinite canvas - video guide 🎥
- 5 ways to create a new file
- Getting started with Whimsical AI
- How to create a new workspace
- How to use AI-assisted mind mapping
- Customizing file and folder icons
- Mentions in Whimsical files
- Customizing diagram shapes
- Getting started with sequence diagrams
- Commenting in Whimsical files
- Getting started with flowcharts
- Getting started with mind maps
- Getting started with wireframes
- Using Whimsical Boards
- Mentions in Whimsical files
- Customizing diagram shapes
- Using sections on the Whimsical canvas
- Sketch on the canvas with freehand drawing
- Annotating files for more detail
- Text-to-object pasting options
- Adding and displaying links in Whimsical files
- Linking to sections and objects
- How to draw a line
- How to filter selected objects
- Presenting in Whimsical
- Voting on task cards and sticky notes
- Using the timer in boards
- Working with the grid and auto-alignment
- Working with connectors
- Does Whimsical have cloud architecture icons?
- Using tables in Whimsical
- Using sticky notes in boards
- Optimizing performance in larger files
- Embedding external content into Whimsical
- Using spellcheck
- Setting custom thumbnails
- How overlays work in Wireframe mode
- Hiding cursors while collaborating
- Measure between objects in Boards
- Uploading files to Whimsical
- Getting started with sequence diagrams
- Commenting in Whimsical files
- Getting started with docs
- Mentions in Whimsical files
- Text-to-object pasting options
- Adding and displaying links in Whimsical files
- Linking to sections and objects
- Using tables in Whimsical
- Embedding external content into Whimsical
- Using spellcheck
- Changing page width and text size in Docs
- Collapsing text with toggles
- How to create a new workspace
- Requesting file access
- Workspace discovery settings
- Sorting files and folders
- Changing workspace members’ roles
- Adding and removing members
- Creating and managing teams
- Requesting workspace editor access
- Linking between files
- Member roles in Whimsical
- How to delete a workspace
- How to upgrade your workspace
- Guest access
- Renaming your workspace
- Offboarding users
- Consolidating workspaces
- Uploading files to Whimsical
- Organizing your work with tabbed folders
- SAML
- Setting up SAML session expiry
- Security
- Prevent new workspace creation
- Customizing file and folder icons
- How to draw a line
- How to filter selected objects
- Does Whimsical have cloud architecture icons?
- How overlays work in Wireframe mode
- Moving and copying files
- Using Whimsical on mobile
- Does Whimsical have a dark mode?
- File version history
- Why are the colors of some elements toned down?
- Does Whimsical support offline mode?
- Teams, workspaces & sections explained
- Does Whimsical work on iPad?
- Free viewers commenting in workspaces
- Syntax highlighting in code blocks
- Whimsical desktop app
- Is Whimsical available in other languages?
- Inverting the zoom direction in Whimsical so it works more like Sketch
- Troubleshooting issues and reporting bugs
- How to add emojis
- Team FAQs
- How to restore deleted files from the trash
- Searching in your Whimsical workspace
- Organizing files in your workspace
- I’ve upgraded but still don’t have access to the paid features
- Why can't I edit my files?
- Reporting content in Whimsical
- Does Whimsical have an affiliate or referral program?
- Collaborating with others in real time
- Sharing files and managing access permissions
- Hiding cursors while collaborating
- How to switch between workspaces
- Sharing feedback and feature requests
- Embedding & integrating boards with Jira Issues
- Integrating Whimsical with Google Docs
- Embedding files in ClickUp views
- Embedding files in Asana
- Embedding Whimsical files
- Whimsical AI Diagrams for ChatGPT
- Creating Jira & Confluence Smart Links for Whimsical Files
- Embedding files in Guru
- Embedding files in Trello
- Embedding & integrating boards in Notion
- Integrating Whimsical and GitHub
- Embedding files in Zendesk
- Support Whimsical embeds in your app with EmbedKit
- Whimsical previews and notifications in Slack
- Embedding files in Canva
- Integrating Whimsical and Linear
- Embedding files in Nuclino
- Embedding files in Monday
- Embedding files in Medium
- Embedding files in Slab
- Embedding files in Coda
- Whimsical API (Beta)
- SAML
- SAML SSO in Whimsical
- SAML SSO with Okta
- SAML SSO with Auth0
- SAML SSO with OneLogin
- SAML SSO with Microsoft Entra ID (Azure AD)
- SAML SSO with Google Workspace (previously G-Suite)
- SAML SSO with Active Directory Federation Services (ADFS)
- SAML SSO with other identity providers
- Setting up SAML session expiry
- Managing email changes with SAML and SCIM
- SCIM
- Setting up SCIM with Okta
- Setting up SCIM with JumpCloud
- Setting up SCIM with Entra ID (Azure AD)
- SCIM provisioning with Groups in Okta
- SCIM user provisioning in Whimsical
- SCIM provisioning with Groups in Entra ID (Azure AD)
- Security
- Setting up Two-factor Authentication (2FA)
- Prevent new workspace creation
- Whitelisting Whimsical domains
- Signing in with your Whimsical account on multiple devices
- Contact us
Creating and managing teams
Teams allow you to better organize your workspace and ensure the right people can conveniently access the right files.
Create a teamCopied!Link to this section
There are multiple ways to create a team:
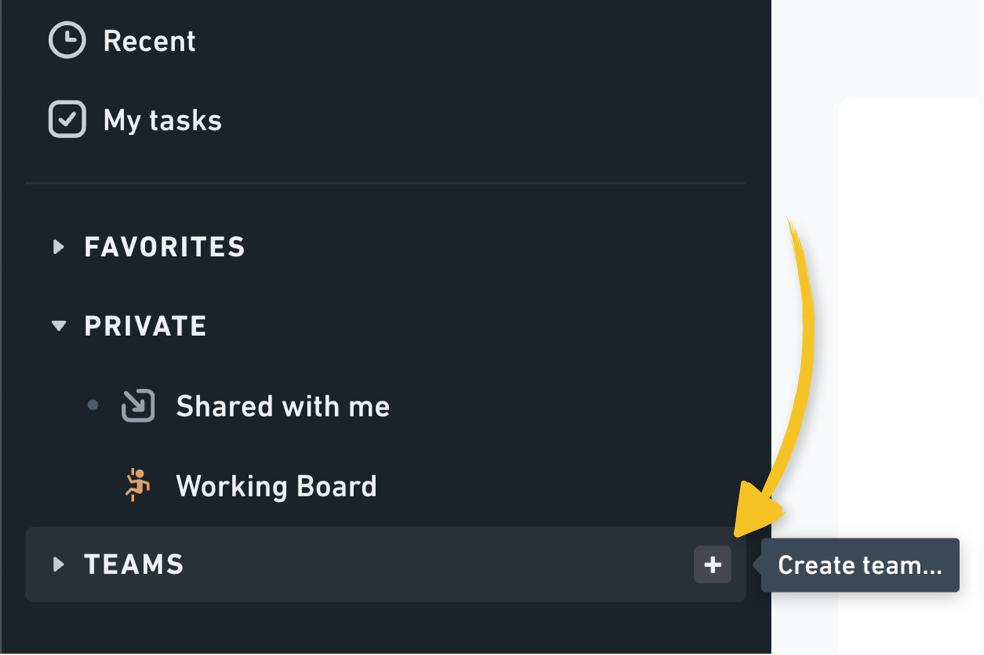
1. Use the “+” button from the sidebar:
2. Go to Workspace settings, which you'll find under your workspace name in the top left, then switch to the Teams tab and click Create a team:

3. Right-click on an existing folder to convert it to a team:
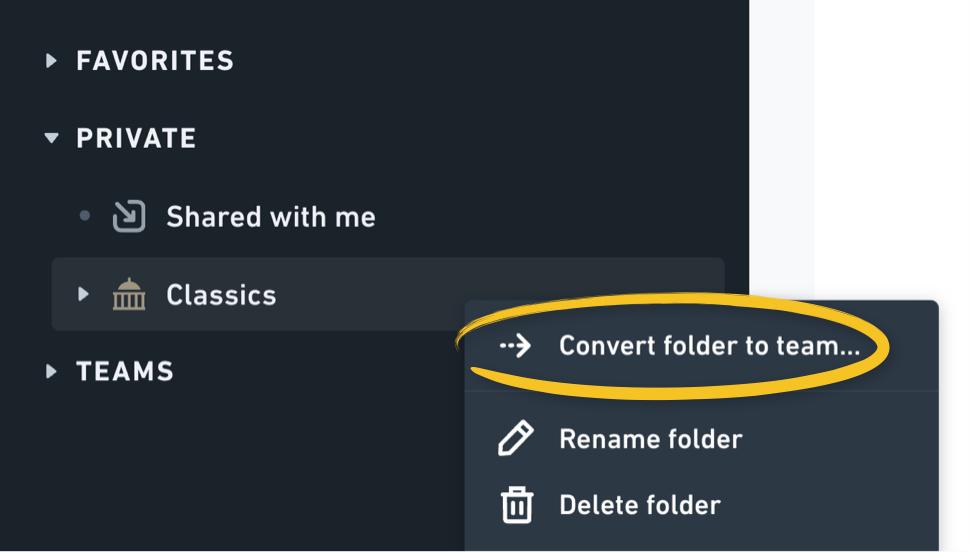
However you create the team, you'll be asked to name it, make it private or keep it open, and choose the default user role for workspace members who join the team.
Note:
- Private teams and the Viewer role are not available on the Free Plan. They are available when you upgrade to our one of our paid plans.
You can also customize your team appearance. Change the team color and icon by clicking on the dropdown menu next to the name of your team:

Finally, you’ll see the option to invite workspace members to join your newly created team. 👌
Customize a teamCopied!Link to this section
Create a home for your teamCopied!Link to this section
Each team can create a home, which is a great place to share important details such as your team's goals, function, information about team members, making it easier for others to get to know your team, understand how you work and what you're working on.
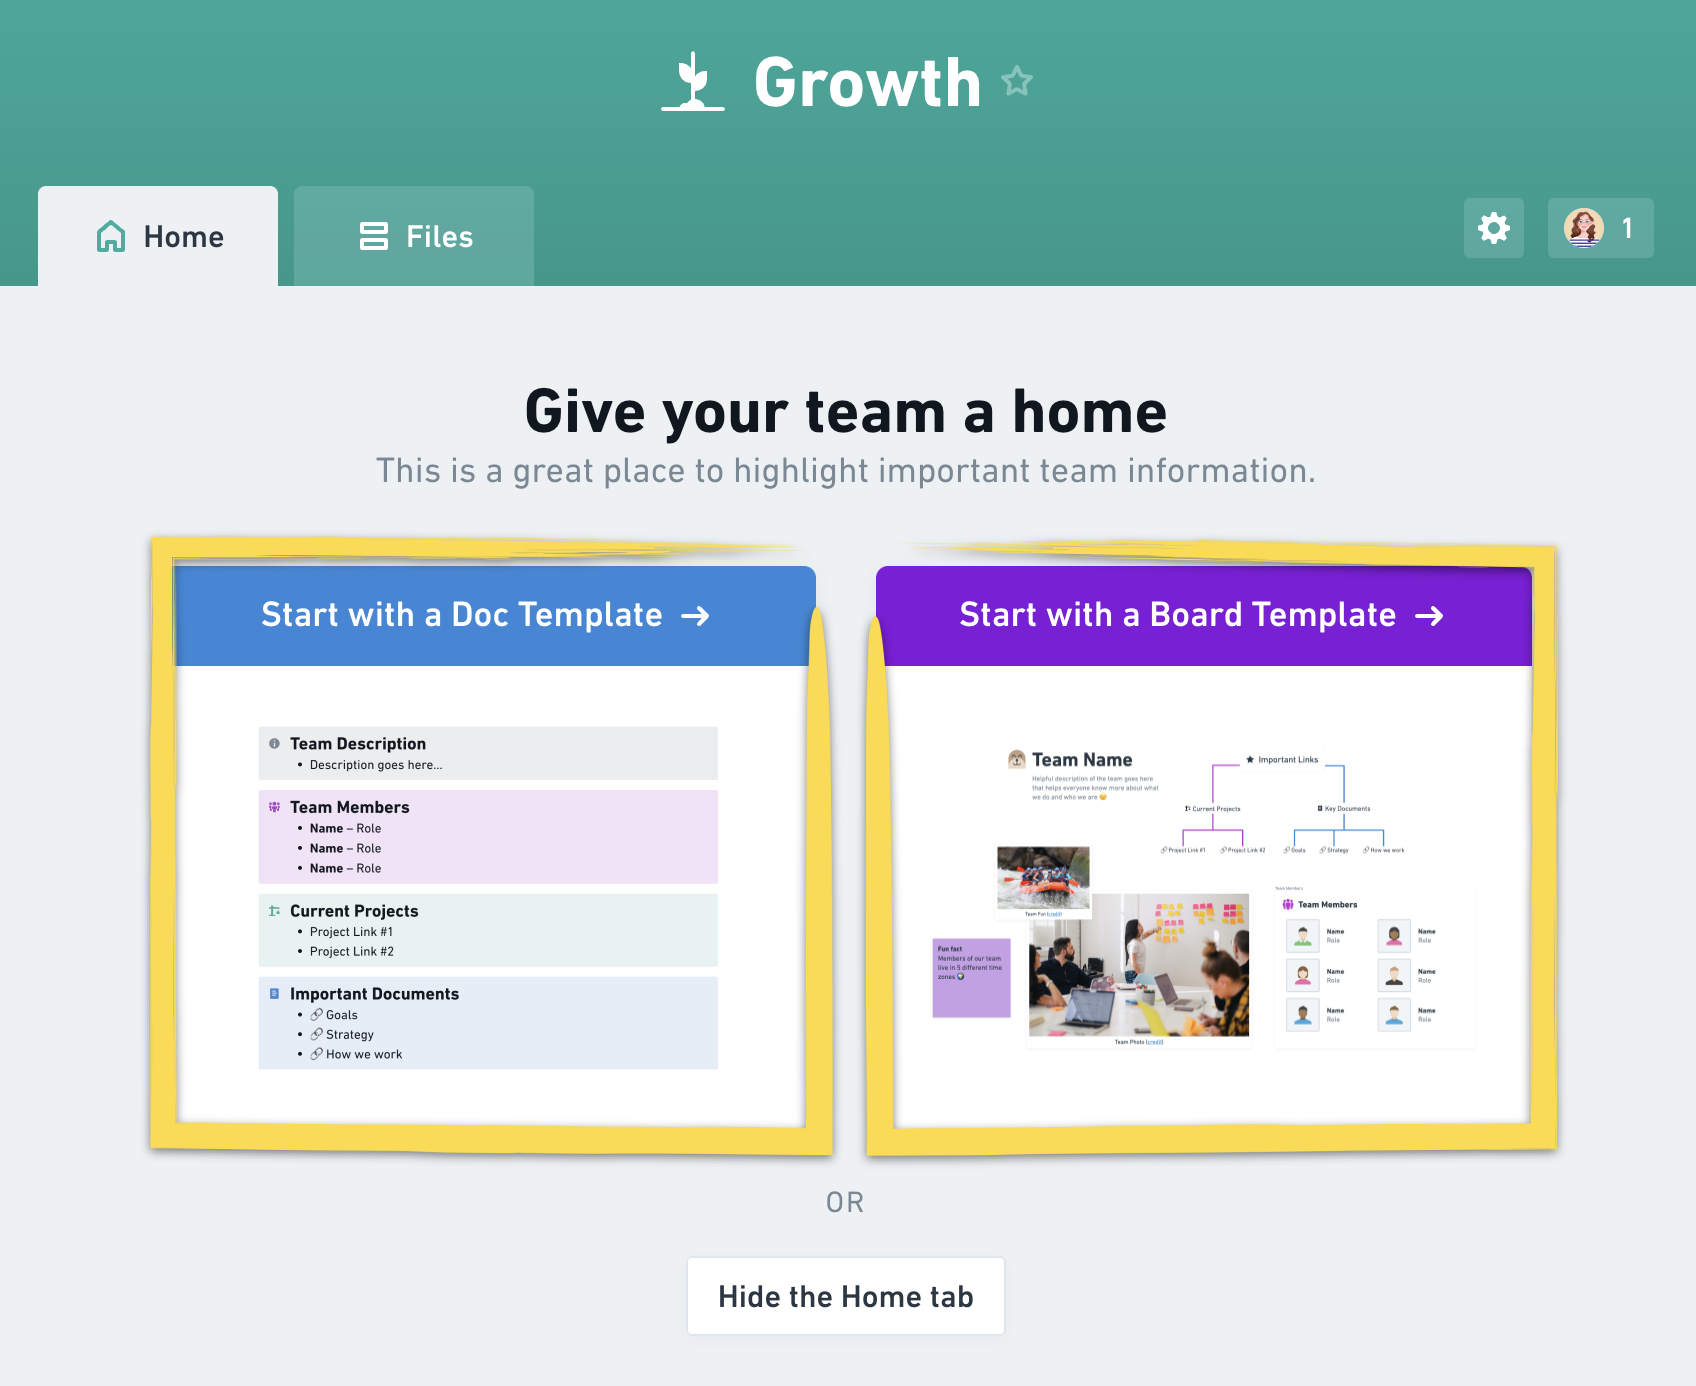
You can create your team's home using one of our templates which you’ll find in the team’s Home tab:
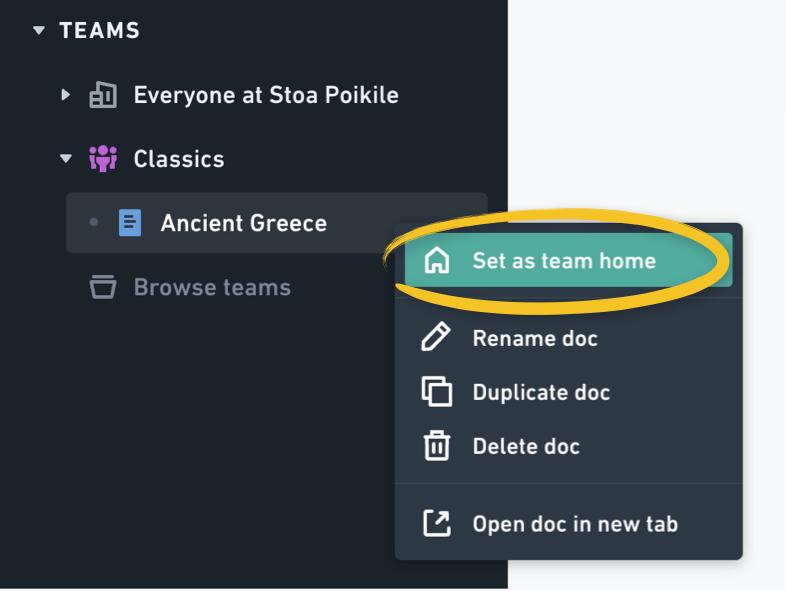
Alternatively, you can create your own file from scratch and set it as your team's home. Just right-click the file and select Set as team home:
To remove an existing team home, right-click the file that’s currently set as your team home or the Home tab itself, and select Remove as team home:

Here are a few ideas you can add to your team’s home:Copied!Link to this section
- Centralize important resources: Your team's home can serve as a hub for frequently used resources, making it easy for team members to find what they need.
- Keep everyone informed: Keep everybody up-to-date about important news by featuring a roadmap or an announcement board with sticky notes.
- Feature key files: Showcase your team’s most important docs and other resources by adding links to key documents or creating a file library.
- Highlight your team: Introduce others to your teammates to help everyone understand your roles and responsibilities and how to best collaborate with you.
- Please note: If your team's home is created on a board, this will contribute to the board limit on the Free plan as one of your three shared boards. To get unlimited shared boards, upgrade to one of our paid plans.
Change team color, icon, or nameCopied!Link to this section
To rename your team or change its color or icon, click the gear icon on the right of the team header:

A new window will appear, where you can modify your team's name and appearance:

Add new members to a teamCopied!Link to this section
When you invite a new person to your workspaceCopied!Link to this section
To add new members to one or multiple teams as soon as they join your workspace, you can:
1. Click Invite people to [workspace name], which you’ll find under your workspace name in the top left and add one or multiple teams from the list:
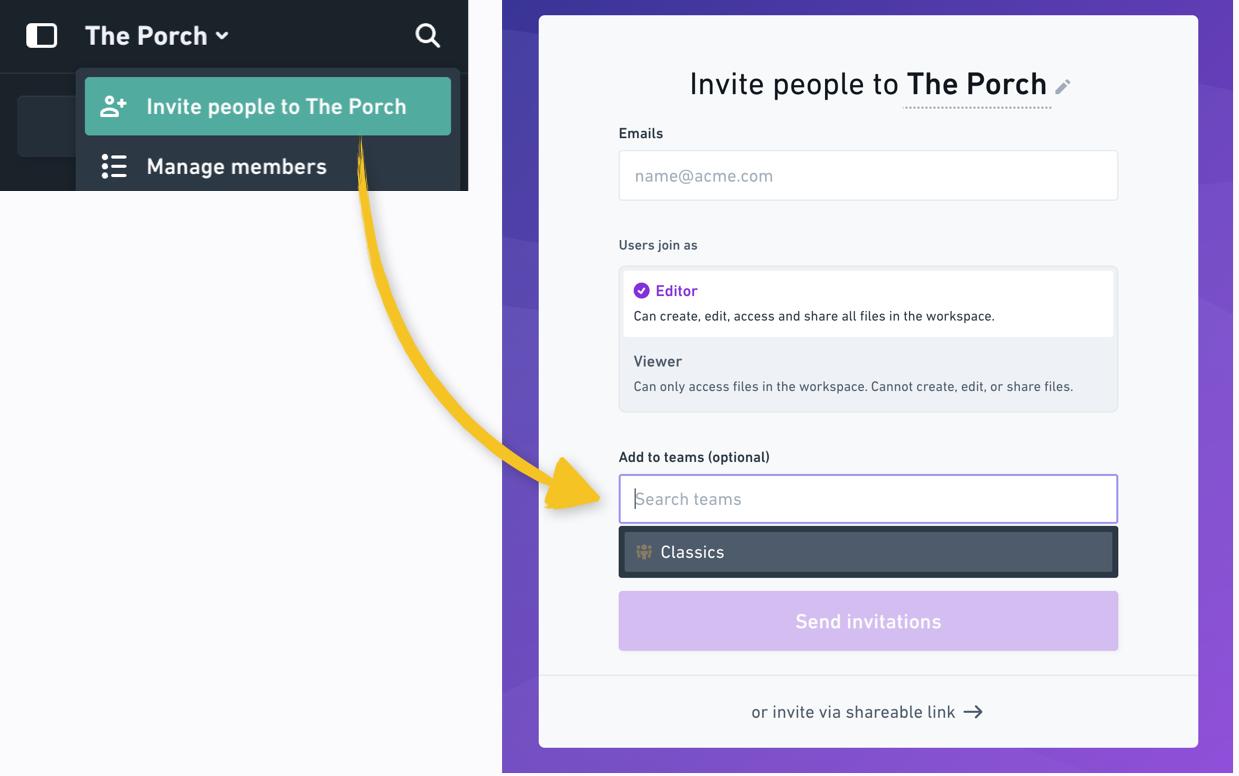
Note:
- If your workspace has SAML SSO enabled, you'll first need to add new members to the workspace before adding them to any teams.
- You won't be able to add teams to generic invite links as teams can only be added to individual invites.
Adding existing members of your workspaceCopied!Link to this section
There are two ways to add existing members of your workspace to a team.
1. Click Manage members from the team view:

2. Go to Workspace members settings and click the “+” button next to a workspace member:

Note:
- All members of the workspace are automatically included in the “Everybody at [workspace name]” team, which serves as a place to share information relevant to everybody in the workspace (e.g. company-wide goals or wikis). It’s not possible to leave this team.
- Private Teams are not available on the Free plan. They are available when you upgrade to our Business plan.
Set default team member roleCopied!Link to this section
To better control access to the files stored in a team, workspace admins can set the default role for members joining a new team. You can choose the default role when creating a team or in the team settings page:
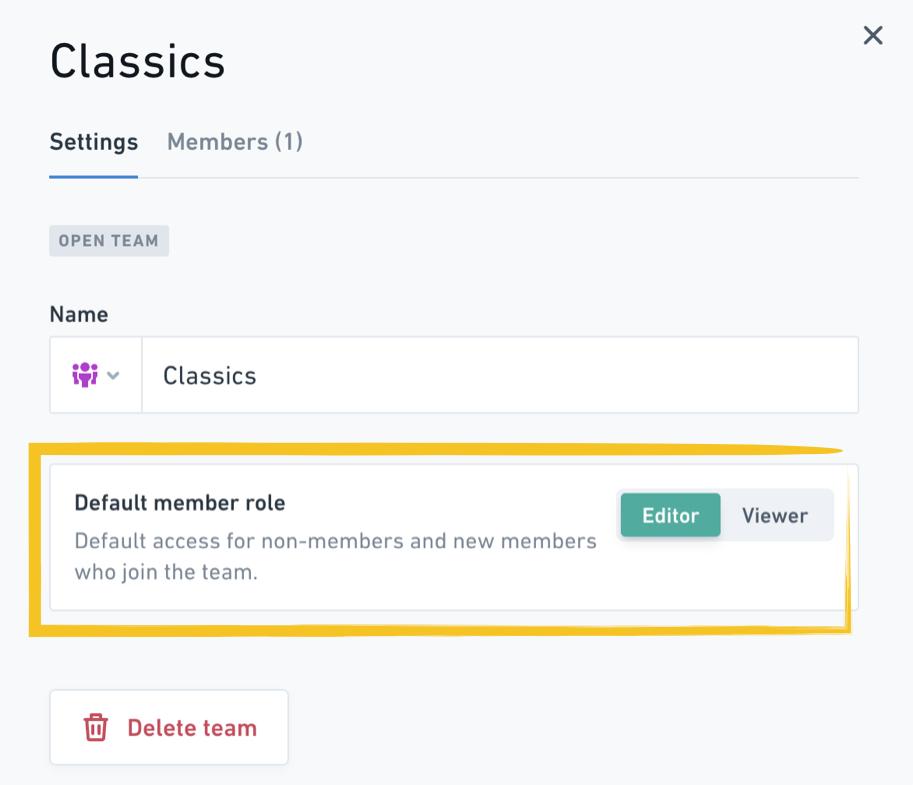
This will define what a member can do in each team, and each workspace member can have different roles in different teams.
Team editors can edit and create new files in the team, whereas team viewers can view and comment on all files shared in a team. You can learn more about member roles in this article.
Note:
- Even if the default team role is set to “Editor”, workspace members with “Viewer” role will only be able to view and comment on the team files. Admins can update workspace member roles in the Workspace Members Settings.
- If the default team role is set to “Viewer”, workspace members with the “Editor” role will be limited to viewing files and adding comments.
- In open teams, the set team member role will also define the access for other workspace members that are not members of the specific team.
- The Viewer role in a workspace is not available on the Free plan. It is available when you upgrade to one of our paid plans.
Change team member rolesCopied!Link to this section
To change individual team member roles, click Manage members. then add or remove each person from the team editors:
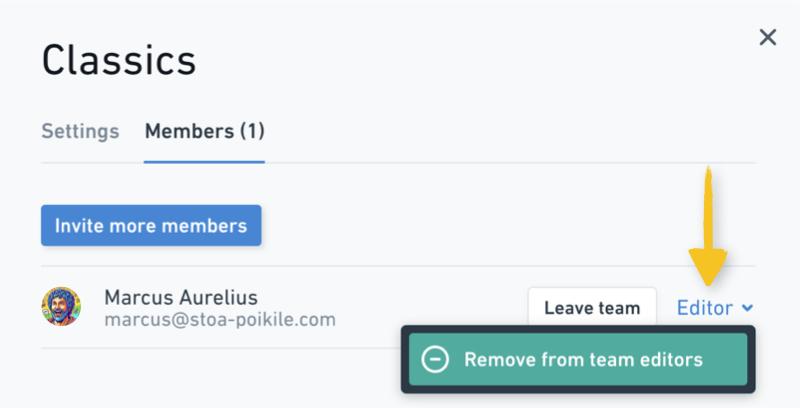
Anyone removed from the team editors will become a team viewer, and vice versa.
You can learn more about member roles in this article.
Remove members from a teamCopied!Link to this section
To remove someone from a team, open Manage members and click the down arrow next to the person’s role you want to remove. Select Remove from team:
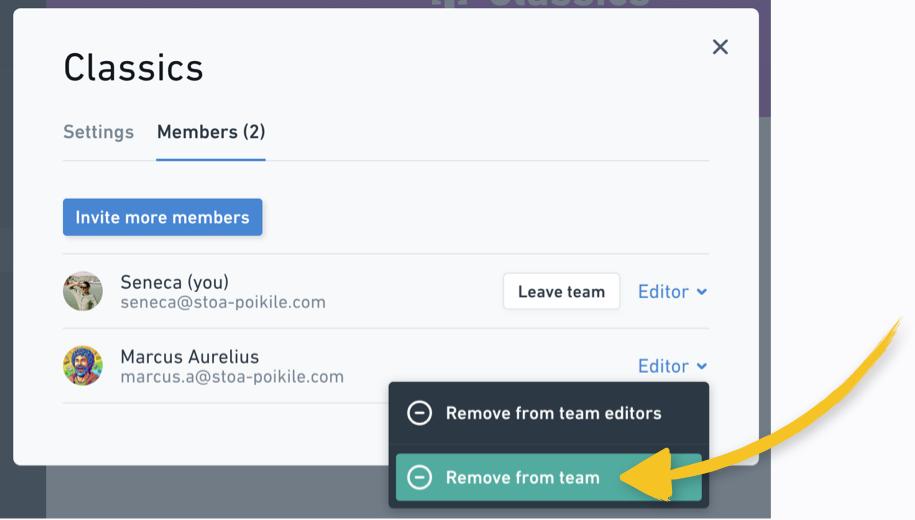
Note: Only workspace admins or team editors can remove and add members, set default member role, change member roles, or rename teams.
Join or leave a teamCopied!Link to this section
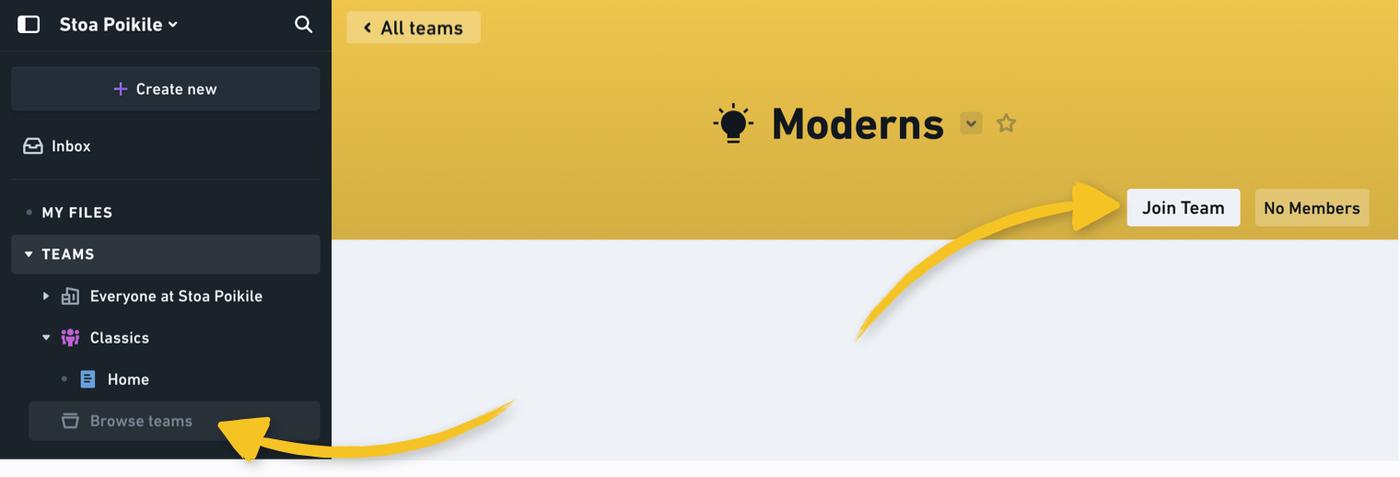
Go to Browse teams from the sidebar, then click on the team you want to join and click “Join Team” in the top-right:
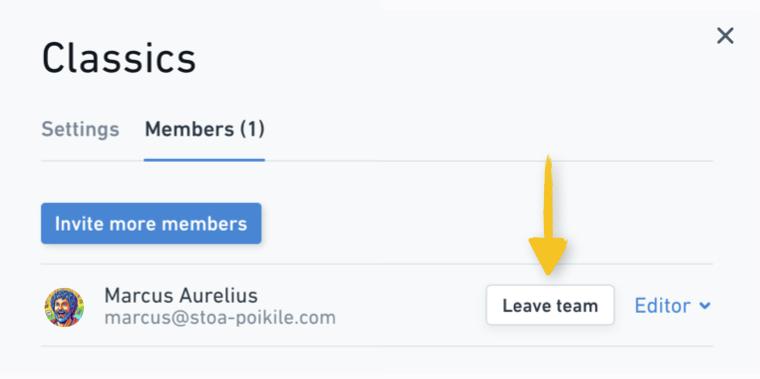
To leave a team go to Manage members, then click “Leave team”:
Delete a teamCopied!Link to this section
To delete a team, click the gear icon on the right of the team header:

Then choose Delete team and confirm the deletion by entering the team name.
Note:
- Team deletion cannot be undone. Once a team is deleted, all team folders and files will be permanently lost.
- Only workspace admins or team editors can delete teams.
Summary
- Creating and managing teams
- Create a team
- Customize a team
- Create a home for your team
- Change team color, icon, or name
- Add new members to a team
- When you invite a new person to your workspace
- Adding existing members of your workspace
- Set default team member role
- Change team member roles
- Remove members from a team
- Join or leave a team
- Delete a team
